WOW Best ASP.NET Core 2 Preview Released

WOW Best ASP.NET Core 2 Preview Released

CheapASPNETHostingReview.com | Best and Cheap ASP.NET Core hosting. The first preview of ASP.NET Core 2 has been released, joining the release of .NET Core 2 Preview.  Developers can now take their first look at the code that will make up this major release that will adhere to .NET Standard 2.0.

net-core-logo-proposal

Among the new features found in 2.0 are meta-packages, a new default Web Host Configuration, simplified logging, and an improved ASP.NET Core Identity system which makes it easy to change authentication providers.  The addition of meta-packages provides an alternative way for projects to be setup:  simply add the Microsoft.AspNetCore.All package to get started.  Unused subcomponents will be trimmed automatically when the application is built.  These changes are on top of the many performance improvements which according to Microsoft produce web apps that start and execute quicker as well as use less disk space as compared to ASP.NET 1.X.

At Build 2017, Microsoft’s Daniel Roth and Scott Hanselman were on hand to demonstrate firsthand what ASP.NET Core 2 offers developers.  The development team had four primary goals in mind when producing this release:

  1. Developer delights – Remove the papercuts (frustrating behavior) experienced when writing for ASP.NET Core
  2. Extending App Model
  3. Performance
  4. Increased Azure Integration

Razor Pages have been added to ASP.NET Core 2 to provide a way for developers to start building web applications without requiring the infrastructure of a full MVC app.  One of the benefits to this approach is that since Razor pages are built on top of MVC, it is easy to later transform a growing application into a proper MCV solution.  Razor pages utilize the @page directive to handle requests directly without needing a corresponding controller.

To use ASP.NET Core 2 Preview with Visual Studio 2017, you will need to install the latest build (15.3 Preview).  Visual Studio is not required and working from the Windows command line, Mac or Linux is also an option.  Installation binaries are available for all three platforms today.

Remember that this can be installed side-by-side with your current production copy of VS2017 15.2.  Full release notes are available on GitHub. It should also be noted that ASP.NET Core 2 applications will be able to run on Mono, .NET Core, and .NET Framework.

ASP.NET Core 2.0.0-preview1

The next full version of ASP.NET Core is on its way, and developers who have been following along on the ASP.NET GitHub repositories have been very vocal about their interest in the new features in this version.  Some of these new features include:

  • A new ASP.NET Core meta-package that includes all features that you need to build an application. No longer do you need to pick and choose individual ASP.NET Core features in separate packages as all features are now included in a Microsoft.AspNetCore.All package in the default templates. If there are features you don’t need in your application, our new package trimming features will exclude those binaries in your published application output by default.
  • A new default Web Host configuration, codifying the typical defaults of the web host with the WebHost.CreateDefaultBuilder() API. This adds Kestrel, IIS configuration, default configuration sources, logging providers, and the content root.
  • Updated configuration and simplified logging. We have enhanced the LoggerFactory object to easily support a Dictionary<string, LogLevel> that defines log filters instead of a FilterLoggerSettings object, making it simpler to control the source and level of logs that get propagated from your application to your configured log providers.
  • Create pages without controllers in ASP.NET Core with the new RazorPages capabilities.  Just create a Pages folder and drop in a cshtml file with the new @page directive to get started.
  • Debugging your application in the cloud is easier than ever with integrated Azure Application Insights and diagnostics when debugging in Visual Studio and after deploying to Azure App Service.
  • A newly revamped authentication model that makes it easy to configure authentication for your application using DI.
  • New templates for configuring authentication for your web apps and web APIs using Azure AD B2C
  • New support in ASP.NET Core Identity for providing identity as a service. Updated templates decouple your apps from their identity concerns standard protocols (OpenID Connect, OAuth 2.0). Easily migrate apps using ASP.NET Core Identity for authentication to use Azure AD B2C or any other OpenID Connect compliant identity provider.
  • Build secure web APIs using ASP.NET Core Identity. Acquire access tokens for accessing your web APIs using the Microsoft Authentication Library (MSAL)
  • NET Core has always helped HTMLEncode your content by default, but with the new version we’re taking an extra step to help prevent cross-site request forgery (XSRF) attacks: ASP.NET Core will now emit anti-forgery tokens by default and validate them on form POST actions and pages without extra configuration.
ASP.NET Core Identity Tables Customization With Visual Studio 2017

ASP.NET Core Identity Tables Customization With Visual Studio 2017

CheapASPNETHostingReview.com | Best and cheap ASP.NET Core 1.0 hosting. In this article, we will use Visual Studio 2017 and Entity Framework Core step by step to learn how we can:

  1. Change Identity table names.
  2. Change Identity table property names.
  3. Change Identity table datatype of primary key.

When you decide to use ASP.NET Core Identity it will generate some tables used to store data for users and other things.

Prior to it, let’s take a brief definition about ASP.NET Core Identity.

Released on 2016 and from the name we can say it’s all about identity of the users, you can manage login and Logout functionality, create an account also you can use external login providers such as Facebook, Google, Microsoft Account and Twitter. In other words, you can say, it gives you the ability to make an authentication and an authorization.

Let us see it in action

Open your Visual Studio 2017

image001

I am using an Enterprise edition but you can use any edition, which is available to you.

File > New > Project

Click ASP.NET Core Web Application and give it a name, as shown below.

image002

Select Web Application.

image003

Click Change authentication, select an individual user account and click OK, as shown below.

image004

Now, we have an Application but we need to make migration and we have several ways to achieve it. We will use Package Manager, as shown below

image005

Now, you need to create the database. Go to appsettings.json file and edit your connection string, if you want. I am using SQL Server 2016, so this is my appsettings.json file and it looks, as shown below.

Now, in Package Manager console, write Add-migration command, followed by the name of this migration command like this and wait for some seconds.

image006

Now, update the database and click enter.

image007

Now, go to the database and refresh it. You will find aspnet-IdentityConfig database with some tables created by default like AspNetUsers table.

We will use this table to achieve our goal.

image008

Now, how can we change this table name from AspNetUsers to AspUsers as example.

It’s database stuff, so we can achieve this from ApplicationDbContext class.

image009

To be specific from OnModelCreating method into this class, we can customize our ASP.NET Identity model and override the defaults like change table name, property name and others.

We will change the table name now from AspNetUsers to AspUsers by this code inside OnModelCreating method. Proceed, as shown below.

Note- After any customization in the tables, you should make database migration and update it to reflect the changes.

First, write add-migration. Subsequent to the migration, update the database.

image010

Now, refresh the database and you will find the name changed to AspUsers.

image011

Change Identity table property name

We need to change as an example Email to EmailAddress in AspUser table

image012

It’s very similar to what we did before, just we will add the code to the OnModelCreating

In this code we told entity to get Email property and change this column name to EmailAddress

Now you should make a migration to reflect your changes on Database and we will use it as usual

Add-Migration command then Update-Database

image013

Now it’s time to look in the database

image014

Change Identity table datatype of primary key

We will need to make some changes in ApplicationUser class so go to this class and open it

image015

ApplicationUser class contains all the custom information I want to store about a user, also inheritance here from IdentityUser gives me all essentials like username ,id, password property or Email, that means if I want to add any property, I will add it here in ApplicationUser class

By default the primary key is string

image016

Because IdentityUser has the primary key  we want to pass our new primary key datatype.

Where will we pass this new datatype? Look to the picture below

image017

As you can see we need to pass our primary key as example int datatype to IdentityUser<int> .

The code will look like this

And because every user has roles we will need to make this change in roles also by creating new class ApplicationRole which will inherit from IdentityRole class and pass the new datatype to it, and the code will look, as shown below.

Afterwards, we will make some change in our ApplicationDbContext class in order to open it.

image018

We need to add our new role and datatype IdentityDbContext to the class. It will look, as shown below.

In the last step, we will need to reconfigure ConfigureServices method in the startup class.

We need to make some changes in these lines.

We need to replace IdentityRole class to our role ApplicationRole class and add our new datatype to AddEntityFrameworkStores<ApplicationDbContext,int>

The code will look, as shown below.

Now, we have all the required changes achieved but the last step will be the migration.

This time, we have some new things like when you run add-migration command; you will see the warning, as shown below.

image019

When you try to run update-database, you will get an error told to you.

To change the IDENTITY property of a column, the column needs to be dropped and recreated.

Thus, we will drop the database and create it again.

Step 1

Drop the database command to remove the database and press Y.

Step 2

Remove all the migrations, which you have in Visual Studio.

Step 3

Run add-migration command.

Step 4

Run update-database command.

Now, go to the database to see our changes.

image020

You see now that id has int datatype and not nvarchar.

Summary

Now, you can change an Identity column name, Identity table name, Identity primary key. I hope this is helpful to you.

How To Displaying Google Maps in ASP.NET Application

How To Displaying Google Maps in ASP.NET Application

CheapASPNETHostingReview.com | Best and cheap ASP.NET hosting. In this article I am going to explain toyou about Google Maps and how to integrate it to search any location in ASP.NET. Google Maps is a Web-based service that provides detailed information about geographical regions and sites around the world.

Nowadays Google Maps is used in every application for various requirements. Here in this article I am going to discuss how to integrate Google Maps to search any location in ASP.NET.

First of all, to integrate Google Maps create a new project in Visual studio. Add a new webform as follows.

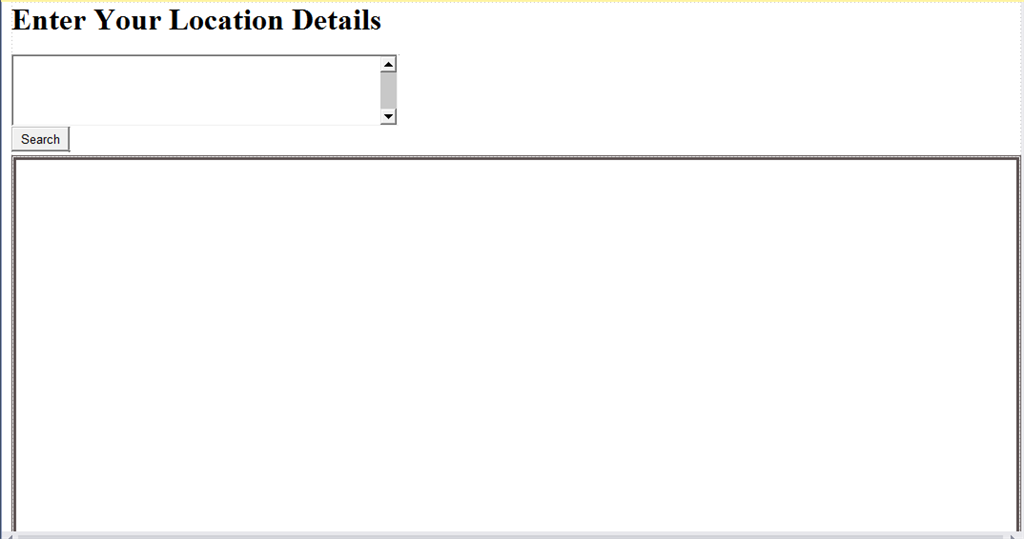
Design the webform as in the following:

google1

Add the following script in the head section

Now add the following div to populate the google map. Here is my complete HTML code.

Here I am attaching the screen shot of my UI.

google2

Now save and run the application.
google3

Now type any location and press the search button, it will search the location and will be shown in the div.

googleLocation

In this way we can search any location detail in Google maps.

How To Creating a Web App Using ASP.NET MVC 4 and AngularJS

How To Creating a Web App Using ASP.NET MVC 4 and AngularJS

CheapASPNETHostingReview.com | Best and cheap ASP.NET MVC hosting. AngularJS and ASP.NET C# MVC are both MVC frameworks for creating web applications. AngularJS is a JavaScript framework for creating web applications while ASP.NET MVC is a framework for creating web applications using HTML, JavaScript and server side programming language like C# etc. In this tutorial series, we’ll see how to create a web application using both ASP.NET MVC 4 and AngularJS. This tutorial would focus on how to use AngularJS for .net developers.

How To Creating a Web App Using ASP.NET MVC 4 and AngularJS ?

Let’s get started from scratch by creating a ASP.NET MVC 4 empty template project. Once the project has been created it shoud empty without any default code. I did this so that you can get a feel of how to get started from the very scratch and understand how thing really work. So, moving on, first we’ll add a layout to our web application. A layout is like a master page that we have in asp.net web form’s project. In our project’s view directory create a folder called Shared and inside that directory create a file called _Layout.cshtml. Here is how it looks like:

Now there are a couple of things in the above HTML code that would be confusing to a beginner. Let’s take them one by one.

The above code renders the bootstrap related CSS files that we would define in the BundleConfig.cs file in the App_Start folder. Let’s create the BundleConfig.cs class in the App_Start folder. Inside BundleConfig.cs we need to register the routes. Here is how it would look like:

Why do we need to use bundle ? Why not include the files directly like we do in web forms ?

Well, bundling helps to compress the JavaScript file and style sheets into a single file to save bandwidth and that’s why we use it.

Add the following line of code in the Global.asax file in the Application_Start :

Next thing that may look odd in the above code is the @RenderBody(). This is the section of the layout page where the content is rendered each time a new request is received.

For the _Layout.cshtml to be accepted as the layout page for our application we need to define it in another file called _ViewStart.cshtml. Inside Views create a file called _ViewStart.cshtml and add the following code :

Ok now we are all set with the layout code for our web application. Now let’s add a controller inside the Controllers folder called LoginController. Inside the LoginController define a method called ShowDefault which would render a default view.
Here is the ShowDefault method :

Right click on the ShowDefault method and add a view with the same name, ShowDefault. Now a file should get created in the Views/Login/. Add the following code to the ShowDefault.cshtml :

Set the default controller and action method to be called when the app start in the RouteConfig.cs file.

Save the changes and try running the application and you should be able to see the asp.net MVC 4 app in action.
CodeHandbook

Integrating AngularJS and ASP.NET MVC 4

To include AngularJS in your ASP.NET MVC web app, download the AngularJS file and place it in the Scripts folder in your web app. Inside the BundleConfig.cs file include the angular js file too.
Inside the _Layout.cshtml file include the AngularJS script as shown :

Add one more file called app.js in the Scripts folder which would be the root file of our AngularJS application.
Here is how app.js would look like:

Include the app.js file as reference in the _Layout.cshtml page.

Inside the _Layout.cshtml file add the ngApp directive to the HTML tag.

And that’s it, AngularJS has been successfully added to the MVC web app and ready to use.

How To Implementing simple token authentication in ASP.NET Core with OpenIddict

How To Implementing simple token authentication in ASP.NET Core with OpenIddict

CheapASPNETHostingReview.com | Best and cheap ASP.NET Core 1.0 hosting. Good news! While the first OpenIddict alpha bits were tied to Identity, the two have been completely decoupled as part of OpenIddict beta1 and beta2. Concretely, this means you can now use OpenIddict with your own authentication method or your own membership stack.


Get started

Register the aspnet-contrib feed

Before coding, you’ll have to register the aspnet-contrib MyGet feed, where the preliminary OpenIddict beta bits are currently hosted. For that, create a new NuGet.config at the root of your solution:

Update your project.json to reference the OpenIddict packages

For this demo, you’ll need to reference 4 packages:

  • AspNet.Security.OAuth.Validation, that provides the authentication middleware needed to validate the access tokens issued by OpenIddict.
  • OpenIddict, that references the OpenID Connect server middleware and provides the logic required to validate token requests.
  • OpenIddict.EntityFrameworkCore, that contains the default EntityFramework stores.
  • OpenIddict.Mvc, that provides an ASP.NET Core MVC binder allowing to use OpenIdConnectRequest as an action parameter.

Add OpenIddict in the ASP.NET Core application

Register the OpenIddict services in the dependency injection container

Register OpenIddict and the validation middleware in the ASP.NET Core pipeline

Make sure to always register the validation middleware very early in your pipeline: if the validation middleware is not at the right place, requests won’t be correctly authenticated when reaching the next middleware (e.g MVC).

The same remark applies to OpenIddict, that must be inserted before MVC to validate token requests before they reach your own code. If you don’t register it correctly, an exception will be thrown at runtime.

Create your own token authentication controller

Create an API controller

Test your ASP.NET Core application

Retrieve an access token from your authentication controller

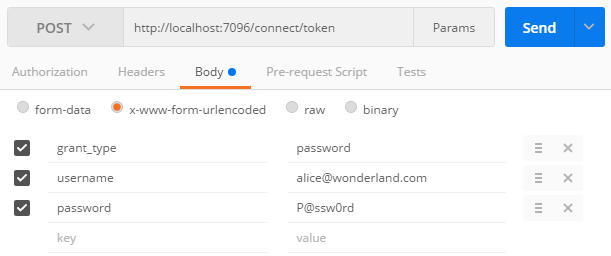
To retrieve an access token, send a POST request to /connect/token with the grant_type=password parameter and the user credentials:

token-request

If the credentials are valid, you’ll get a JSON response containing the access token:

Query your API controller using a bearer token

To send an authenticated request, simply attach the bearer token to the Authorization header using the following syntax: Authorization: Bearer [your bearer token] (without the square brackets)

api-request

If the access token is valid, you’ll get a JSON payload containing the user details returned by the API:

How To Create ASP.NET Core Web API in Visual Studio 2015

How To Create ASP.NET Core Web API in Visual Studio 2015

CheapASPNETHostingReview.com | Best and cheap ASP.NET Core 1.0 hosting. This tutorial lets us create very basic ASP.NET Core Web API using Visual Studio 2015. We will be creating Contacts API which lets do popular CRUD operations.

ASP.NET Web API is a framework that makes it easy to build HTTP services that reach a broad range of clients, including browsers and mobile devices.

ASP.NET Web API is an ideal platform for building RESTful applications on the .NET Framework. Update 12/10 – Updated to ASP.NET Core 1.0 with EF Core

Step 1 : Contacts API Overview

The Contacts API is very simple, basic Web API which does CRUD operations. I have focused on writing web API rather than integrating it with databases.  This table summaries Contacts API which we’ll create

tble

Step 2: Create ASP.NET Core Web API project

Install ASP.NET Core 1.0

Open Visual Studio 2015 Update 3, create “New Project” with name “ContactsApi

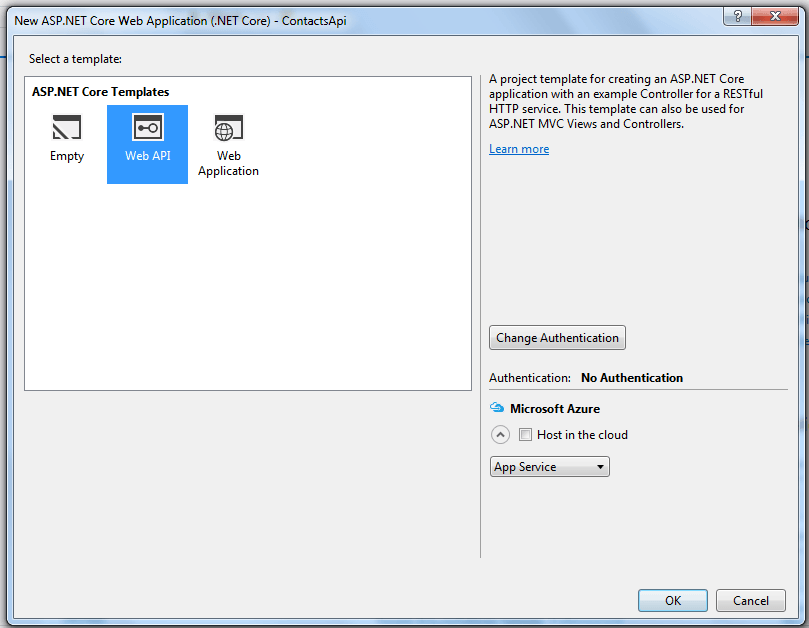
From ASP.NET Core templates select “Web API” as shown in image (I haven’t selected any Authentication, we will add them later)

apiFirst

Program.cs is newly added file, it’s entry point when application run, that’s right public static void main(). ASP.NET Core apps are considered as console apps.

Step 3: Packages included for ASP.NET Core Web API

The packages included are “MVC”, “EnvironmentalVariables”, “JSON”, “Logging”. (This is generated by default, do not copy this)

Step 4: Creating Contacts model

Contacts class is centre of this Web API project. Its POCO class containing some properties which are self explanatory.

Right click “ContactsApi” solution, create folder “Models“; under this “Models” folder create C# class “Contacts.cs” and copy this code

Step 5: Create and Register repository class for Contacts

The use of repository classes is really optional, but I have added it so that we can connect to any databases later.

Create “Repository” folder under “ContactsApi” solution, we will add one C# interface file and C# class file implementing this interface.

Create “IContactsRepository.cs” interface file in “Repository” folder and copy below code

Create “ContactsRepository.cs” class file, implement “IContactsRepository” and copy below code

ASP.NET MVC 6 provides out of box support for Dependency Injection, we will include that in our “ConfigureServices” method of Startup.cs.  We will see entire code in Step 7

Step 6: Add Contacts API Controller

Its time to add the controller API which acts as Web API. Create “Controllers” folder under “ContactsApi” project solution and add C# class file “ContactsController.cs“; copy below code

Some quick notes of this ContactsController

  1. [Route(“api/[controller]”)] – this used attribute based routing to access the ASP.NET Core Web API.
  2. ContactsRepo is instantiated using dependency injection which we configure in services.cs.
  3. GetAll() is simple HttpGet method which gets all contacts
  4. GetById fetches contact based on mobile phone. Its given HttpGet with Name attribute so that we can use that in Create method to be used for location header.
  5. Create method after inserting contact, returns 201 response and provides location header.

Note: HTTP Status codes are now written as BadReqest(), NotFound()Unauthorized() etc

Step 7: Enable CamelCasePropertyNamesContractResolver

Any Web Api (REST based) should return JSON response in form of Camel Case so that we can sure consume the API in any client. We need to enable CamelCasePropertyNamesContractResolver in Configure Services.

Here is the Startup.cs file which has all code needed for running this Contacts ASP.NET Core Web API.

How To Generating SEO (and user) friendly URLs in ASP.NET MVC

How To Generating SEO (and user) friendly URLs in ASP.NET MVC

CheapASPNETHostingReview.com | Best and cheap ASP.NET MVC Hosting. In today’s blog post I would like to demonstrate how to generate “friendly” URLs in your ASP.NET applications. Friendly not just in the sense that someone can look at it and figure out what the URL is pointing to, but more importantly friendly for search engines.

Right now you may probably ask what difference it makes to search engines like Google what the URL of a page is? Surely a computer does not care? Well you would be sort of right, but the thing is that having keywords you are trying to rank for in the URL of a page, does indeed make a difference.

There are many things which play a role in how Google determines the ranking of a web page, and no one can say for certain exactly how big a part each of those factors play. What most people agree on however is that having the keywords you want a page to rank for in the URL of the page does indeed help with the ranking of the page.

In this blog post I am going to show you how to generate URLs in your application which is more SEO – and user – friendly.

Generate URLs

In my sample application I have created a fictitious product database which displays a listing of products, and allows a user to click on a specific product to navigate to the details page for that product.

My product class is fairly simple:

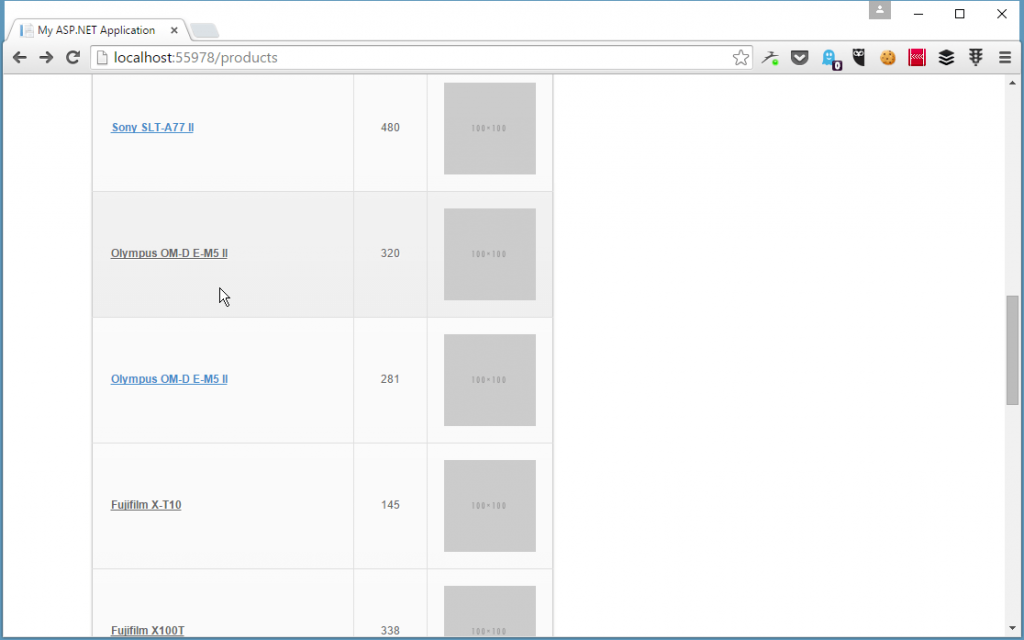
On the product listing page I simply display a list of products:

product-listing

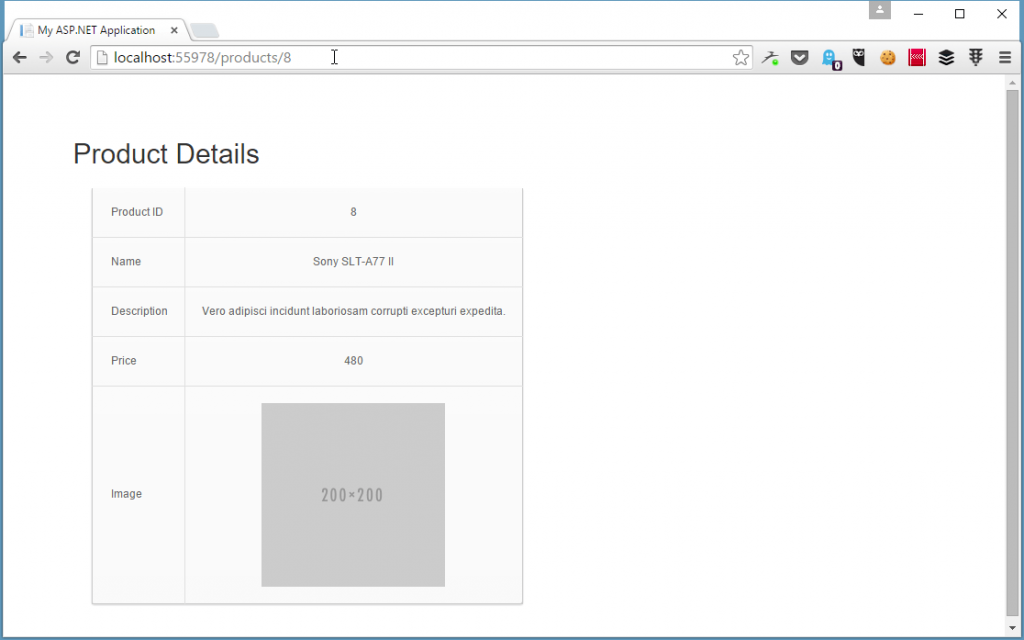
And when the user clicks on a specific product they are navigated to a product details page:

product-detail-with-id

Take a look at the URL which we are generating:

product-id-url

It is just a normal URL as you get in most ASP.NET MVC application which passes along the ID of particular database row to the controller action.

We want to have something which is more user friendly. Something which at least also contains the name of our product. To generate a friendly URL I have created a new method on my Product class which generates a proper “slug” (or URL) for the product details page:

And I have also updated my listing page to use the slug as the route parameter instead of the Id as it did before:

Now when I navigate to the product detail page I can see that we have a proper “friendly” URL which contains the name of the product:

product-detail-with-slug-but-error

Parameter binding

But also notice that we have a new error. ASP.NET MVC is complaining that it was expecting an id route parameter, but could not find it. This is because the Details action on my controller is expecting an integer value for the id parameter:

But instead of an integer, the {id} part of our route now contains a string. The MVC framework is trying to convert the string to an integer, but cannot do it and therefore it is passing a null value along, and then complains that the id parameter cannot contain a null value.

To fix this error we need to modify the RouteData for the route to fix up the value of the id route parameter.

I have created a new class called SeoFriendlyRoute that inherits from Route and have overridden the GetRouteData method to clean up the id parameter. In my implementation I call the base GetRouteData method and check if the route data is not null, in which case it means that I have a match for my route.

In this case I simple check whether the id parameter is present and if it is I use a regular expression to extract the first part of the URL that contains the actual numerical ID, and I assign that numerical value to the id route value:

And the last bit is to add a new route for the path /products/details/{id} to use my new SeoFriendlyRoute route class:

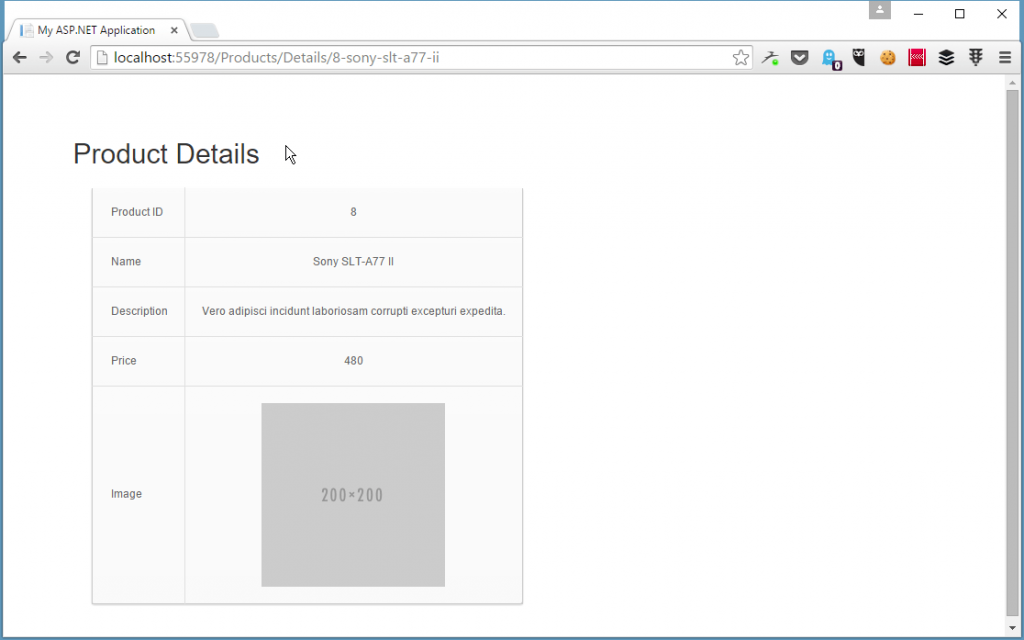
And now when I refresh the page, the parameters are bound correctly as only the numeric part of the product URL that contains the actual product ID is passed along as the id parameter:

product-detail-with-slug

How To Migrate Joomla to New Server

How To Migrate Joomla to New Server

CheapASPNETHostingReview.com | Best and cheap Joomla hosting. In this post we will show you tips to migrate joomla to new server. A Joomla website has to main components – files & folders and database. The files and folders contain all the scripts and coding stuff that works at the back-end and is required to control the outlook of a website. While the database contains all the records of a website including content, pages, and images. The migration of a Joomla website to a new server isn’t really a hectic process, however proper handling and step-following can make it a piece of cake.

Back up all the Files

First of all, login to your website through dashboard or control panel and download all the relevant files to your hard disk. You must be thinking of what program to use for this step; using FTP, FileZilla or Smart FTP would be fine. Make a proper directory such as “public_html” which is the default directory present in a server.

Database Backup

You got to have some tools and components installed on your website to make this step easy. You could use phpMyAdmin or the tools including LazyBackup or JoomlaPack. These two tools allow you to set up and download the record for relocation and also allow backups automatically. You can get backups to your email account if you use LazyBackup tool.

Export your Website

Once you have all the record with you, the next thing you have to do is to upload all the files to the new Joomla hosting by FTP in to that very server. It’s just the opposite step of the previous one so this doesn’t really take long.

Database Migration

To make this tricky step a little easier, go for the databse tool called phpMyAdmin, which would let you create a separate database and load all the previously saved record on it. The alternative way is to run MySQL commands but would take much more time than phpMyAdmin.

Updating the Configuration

Flawless configuration is a must. Make one mistake and you would be making this migration a headache for yourself. The .php files have to be configured in your website and uploaded again on the server. Each and everything including the username, password, database name, and relevant information, would be uploaded on the server. Once it’s done, you can enjoy seeing the website running on this new server.
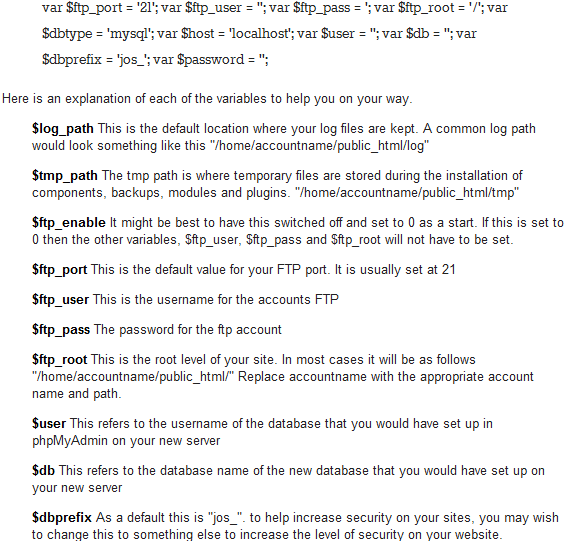
Now change the log directories and temporary files and folders so that they can match up with the new server system. The variables that would have to be changed and updated are:

jml

Test the Installation

You must be done by now, but watch out for anything that is left. Make sure the website is running properly and is allowing you to access the files or content properly, and most importantly do not forget to ensure the proper functioning of the control panel. If you are uncomfortable with it or are facing some issues, let it be fixed by some professional because a mistake done at the backend of website in the programming side can be disastrous if you are not familiar with the coding or scripting.

Tips for Building an API in ASP.NET Core

Tips for Building an API in ASP.NET Core

CheapASPNETHostingReview.com | Best and cheap ASP.NET Core 1.0 hosting. These days users expect a fluid, app-like experience on the internet. Thus, the new web is being built with APIs and single-page frontends. This means it’s more important that ever to build APIs that are easy to use, reliable, and scalable. ASP.NET Core makes it easy to build great APIs, but there are a few tips we’ve picked up that can help make your APIs even stronger and more scalable.

1. Set the Default Route for ASP.NET Core MVC

A lot of programmers who start using ASP.NET Core just use the default app.UseMvc(); line in the Configure method of Startup.cs. There are options that you can pass to the UseMvc function, like setting the default routes, which is one of the most overlooked:

This will set the root route of your API to: http://www.mycompany.com/api to call the DefaultController’s Get method.

What this does for you (aside from the obvious) is it sets the tone for a decent RESTful API. It also makes changes to URL strategy easier, including versioning the API in the URL easy to do if you set the URL strategy in one place.

2. Return IActionResult from .NET Core Controller Methods

Returning IActionResult from your controller methods affords the ability to take advantage of some of the helper methods and classes to ease returning proper HTTP results. The Ok method on the ControllerBase class will return an OkObjectResult that implements IActionResult and returns a 200 OK HTTP message to the caller. The NotFound method returns an object that sends a 404 NOT FOUND HTTP message.

There are quite a few others, but another extremely helpful one is the CreatedAtAction class that returns not only a 201 CREATED HTTP result but adds a header Location with the URL to access the newly created resource.

3. Use the .NET Async Pattern

Network calls by their very nature are asynchronous. It makes the most sense to create async controller methods that extend that asynchronicity when the controllers need to make database and external API calls.

The fact is, asynchronous support in .NET Core and the supporting libraries is very good these days. Using and creating asynchronous code is easy using async/await and libraries that support the Task pattern. The benefit is more simultaneous requests handled with the same hardware requirements.

Asynchronous code just performs better, and since it is so easy to create, why not do it?

4. Use .NET Attributes

Using attributes to decorate routes helps you to take advantage of some of the power of MVC. This may seem counterintuitive since I just told you to use the default routes. Decorating your methods and controller classes with just enough decoration for that class or method can help you take advantage of things like the CreatedAtAction.

You can also use attributes to help the JSON serializer do its job. You can use the NullValueHandling attribute to tell the serializer that when the value of a property is null, not to even serialize the property. You can change the property name that gets serialized so that you can stick with an internal coding standard and still return standard JSON names (like changing ‘MaxTitleLength’ to ‘maxLength’ when serialized). You can even set the order that properties are serialized so that more important properties are serialized first in the JSON documents.

5. Use Async Result Filters

Using Async Result Filters, you can shape the data in the last moments before it goes back to the caller. Usually, you’d add the properties you want (the way you want them) via an anonymous object. There are two problems with that approach, the first is that you need to do a lot of copying of properties and it violates the single responsibility principle. You could use AutoMapper to combat this property copying, but it doesn’t solve the second problem, which is adding new properties (like hypermedia).

Solution: An Async Result Filter will solve both problems and give you a cleaner, more maintainable code base.

BONUS: Try This Workaround to Improve Serialization of Self-Referencing Object Graphs

One of the problems with traditional .NET Web API serialization, is that it doesn’t handle self-referencing object graphs very well. The fact is, in good object-oriented objects there may actually be some reference loops, so it’s important to handle them gracefully.

In your ConfigureServices method of Startup.cs, change your MVC line from:

to :

In .NET 4.x a reference loop would cause an error. Once the serializer realized that serializing the object graph would cause a reference loop, it would fail and just send a 500 error. However, in .NET Core without the above JSON options added, the serializer serializes the object until it hits a reference loop and simply sends what has been serialized so far, ignoring the rest of the object, even if it could serialize the rest of the object graph easily.

What this line adds is, it tells the JSON serializer to ignore reference loops and continue serializing the rest of the graph. So far, this is just a workaround for the issue. It’s not perfect, but it’s better than just a failure.

The best way to handle this problem is to simply not have the problem. Normally, we would put these objects into DTOs that are not self-referencing and remove the problem altogether.

How to Create Dynamic DropDownLists in ASP.NET

How to Create Dynamic DropDownLists in ASP.NET

CheapASPNETHostingReview.com | Best and cheap ASP.NET hosting. In this post I will tell you how to create Dynamic DropDownLists in ASP.NET

Object:

  • Create dropdownlist dynamically with autopostback property true
  • Keep dropdownlist during postback
  • Maintain selected value during postback.

Here is the sample for this :

To Create Dynamic Dropdownlist:

To retrieve value on button click:

Right Now, No output because dynamic controls are lost in postback then what to do.
So we need to save dynamic controls value and generate dynamic controls again.we need to maintain viewstate.