CheapASPNETHostingReview.com | Generally, we use a jQuery unobtrusive validation plugin in ASP.NET MVC Applications.We are going to discuss the following topics in this article:
- Disadvantages of jQuery unobtrusive validation in MVC.
- jQuery tooltip validation
There are some disadvantages of using this plugin. When using the jQuery unobtrusive validation plugin, it creates a span tag to display error messages. If you have, for example, a horizontal form on top of the other controls, then this behavior might not be working for you, since they will break the page layout. It was the case for me and as such, I decided to change the default behavior of the jQuery unobtrusive validation library and instead of using a span to show the error message, I decided to use a tooltip. I am going to show you how I achieved this, using a tooltip with the help of a bootstrap.
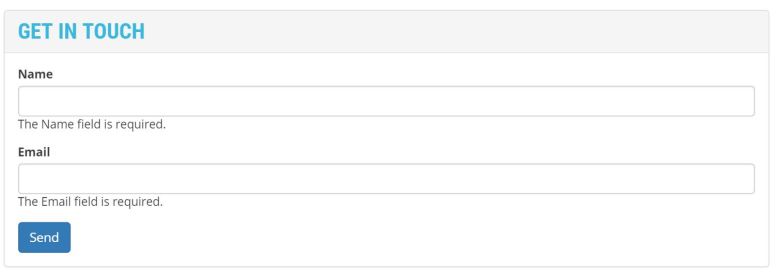
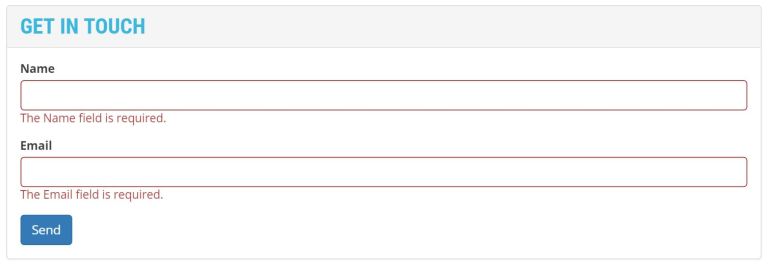
Before going to the tooltip validation, first look at the traditional jQuery unobtrusive example.
The following is an example of an application of unobtrusive validation.
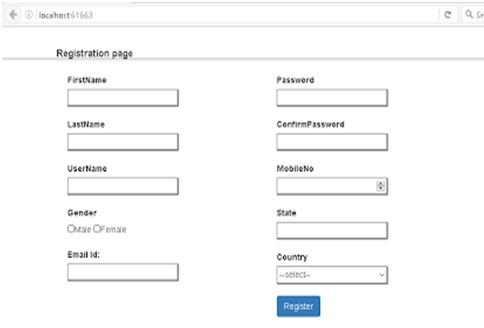
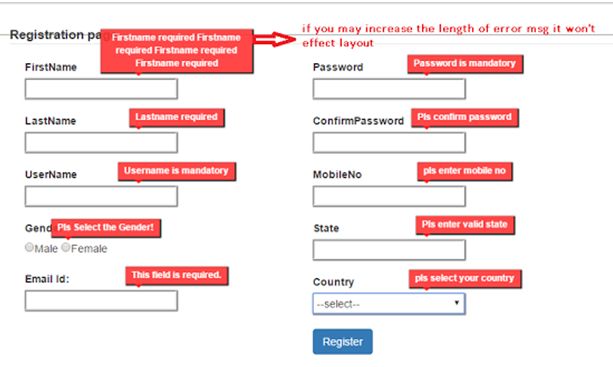
When I click the Register button, the error message comes, as shown below:
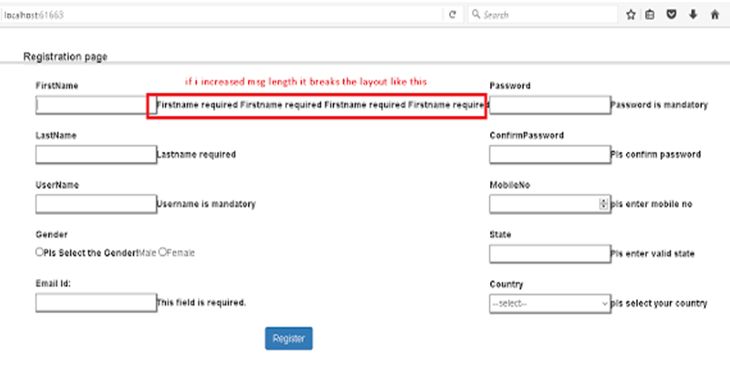
If I increase the length of the error message, the layout will be broken like this. In the same way, when I place the same length error message below, the Textbox controls come as shown in the screenshot. The same layout-change problem occurs. Hence, this is a bad idea of using a default behavior of the jQuery Unobtrusive validation plugin. I replaced the error type with a tooltip. It won’t change the layout structure.
Now the jQuery tooltip validation article begins from here,
jQuery tooltip validation using Twitter Bootstrap
Step 1
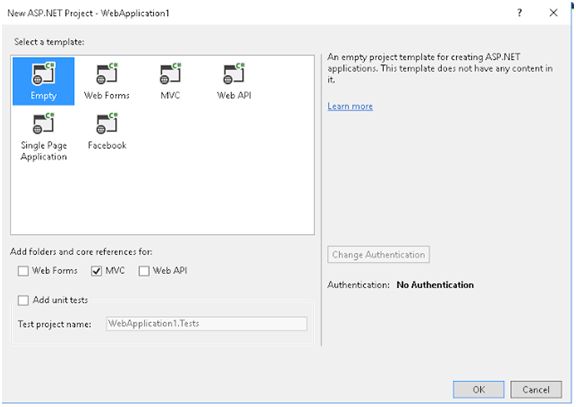
Create ASP.NET MVC Application.
- Create Application with MVC template.
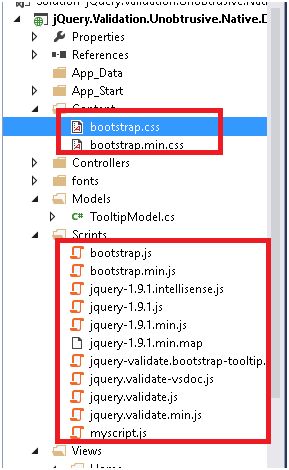
2. Add the following files.
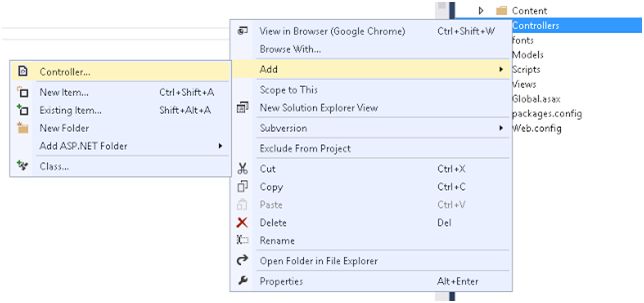
3. Create HomeController.cs.
Right click->Controllers folder->Add->Controller->name it as HomeController.cs.
4. Add Index Method to the Controller.
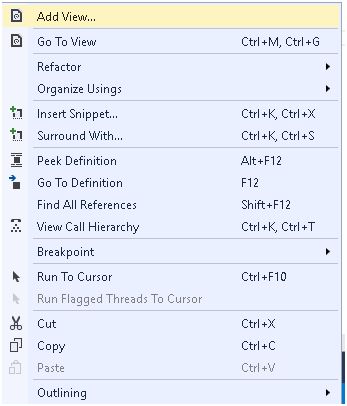
5. Add View to Index Action method.
Right click->Index Method->Add View->click OK.
Index view is created.
6. Now, replace the Index.cshtml code with the code given below:
1 2 3 4 5 6 7 8 9 10 11 12 13 14 15 16 17 18 19 20 21 22 23 24 25 26 27 28 29 30 31 32 33 34 35 36 37 38 39 40 41 42 43 44 45 46 47 48 49 50 51 52 53 54 55 56 57 58 59 60 | <!DOCTYPE html> <html> <head> <title>Bootstrap tooltip Example</title> <!-----------------resource files-------------> <link href="~/Content/bootstrap.min.css" rel="stylesheet" /> <script src="~/Scripts/jquery-1.9.1.min.js"></script> <script src="~/Scripts/bootstrap.min.js"></script> <script src="~/Scripts/jquery.validate.min.js"></script> <script src="~/Scripts/jquery-validate.bootstrap-tooltip.min.js"></script> <script src="~/Scripts/myscript.js"></script> </head> <body> <div id="main"> @using (Html.BeginForm("Index", "Home", FormMethod.Post, new { name = "RegistrationForm", id = "RegistrationForm" })) { <fieldset style="padding-left: 100px; box-shadow: 2px 2px 2px 2px #000;margin-top:30px;height:500px;"> <legend style="font-size:larger;font-weight:bold;">Registration page</legend> <div id="left-part" align="left" style="float:left;margin-left:20px;"> @Html.Label("FirstName", new { required = "required" })<br /> @Html.TextBox("FirstName")<br /><br /> @Html.Label("LastName")<br /> @Html.TextBox("LastName")<br /><br /> @Html.Label("UserName")<br /> @Html.TextBox("UserName")<br /><br /> @Html.Label("Gender")<br /> @Html.RadioButton("Gender", "Male", false, new { id = "rbnMale", name = "rbnMale" })Male @Html.RadioButton("Gender", "Female", false, new { id = "rbnFemale", name = "rbnFemale" })Female <br /><br /> @Html.Label("Email Id:") <br /> @Html.TextBox("Email", null, new { type = "email" })<br /><br /> </div> <div id="right-side" style="margin-left:400px;"> @Html.Label("Password")<br /> @Html.Password("Password")<br /><br /> @Html.Label("ConfirmPassword")<br /> @Html.Password("ConfirmPassword")<br /><br /> @Html.Label("MobileNo")<br /> @Html.TextBox("MobileNo", null, new { type = "number" })<br /><br /> @Html.Label("State")<br /> @Html.TextBox("State")<br /><br /> @Html.Label("Country")<br /> @Html.DropDownList("CountryDropdownlst", new List<SelectListItem>() { new SelectListItem(){Text="India",Value="0"}, new SelectListItem(){Text="China",Value="1"}, new SelectListItem(){Text="USA",Value="2"}, new SelectListItem(){Text="Russia",Value="3"} }, "--select--", new { id = "CountryDropdownlst" }) <br /><br /> <input type="submit" value="Register" id="btnSubmit" name="btnSubmit" class="btn btn-primary"/> </div> </fieldset> } <br /> </div> </body> </html> |
Step 2
Add the script for the validation,
- Add myscript.js to the script folder.
myscript.js
1 2 3 4 5 6 7 8 9 10 11 12 13 14 15 16 17 18 19 20 21 22 23 24 25 26 27 28 29 30 31 32 33 34 35 36 37 38 39 40 41 42 43 44 45 46 47 48 49 50 51 52 53 54 55 56 57 58 59 60 61 62 63 64 65 66 67 68 69 70 71 72 73 74 75 76 77 78 79 80 81 82 83 84 85 86 87 88 89 90 91 92 93 94 95 96 97 98 99 100 | //if no errors form will be submited $.validator.setDefaults({ submitHandler: function () { alert("form submited!"); } }); debugger; $(document).ready(function () { $("#RegistrationForm").validate({ rules: { FirstName: { required: true, minlength: 4, maxlength: 15 }, LastName: { required: true, minlength: 4, maxlength: 15 }, UserName: { required: true, minlength: 5 }, Gender: { required: true }, Email: { required: true, email: true }, Password: { required: true, minlength: 5, maxlength: 20 }, ConfirmPassword:{ required: true, equalTo:"#Password" }, MobileNo: { required: true, number: true, minlength: 10, maxlength:12 }, State: { required: true ,minlength:5}, CountryDropdownlst: { required:true } }, messages: { Gender: "Pls Select the Gender!", FirstName: { required: "Firstname required Firstname required Firstname required Firstname required ", minlength: "pls enter min 4 chars", maxlength:"only 15 chars are allowed" }, LastName: { required: "Lastname required", minlength: "pls enter min 4 chars", maxlength: "only 15 chars are allowed" }, UserName: { required: "Username is mandatory", minlength:"pls enter min 5 chars" }, Password: { required: "Password is mandatory", minlength:"pls enter min 5 chars" }, ConfirmPassword: { required: "Pls confirm password", equalTo:"password does not match" }, MobileNo: { required: "pls enter mobile no", minlength: "pls enter valid mobile no" }, State:"Pls enter valid state", CountryDropdownlst:"pls select your country" }, //tooltip options to change position of tooltip.. tooltip_options: { FirstName: { trigger: 'focus' }, Gender: { placement: 'top', html: true } //placement:'bottom'for bottom }, //submitHandler: function (form) { // $("#validity_label").html(' No errors. Like a boss. '); //}, invalidHandler: function (form, validator) { $("#validity_label").html(' There be ' + validator.numberOfInvalids() + ' error' + (validator.numberOfInvalids() > 1 ? 's' : '') + ' here. OH NOES!!!!! '); } }); }); |
Step 3
Add styles for the error display.
1 2 3 4 5 6 7 8 9 10 11 12 13 14 15 16 17 18 19 20 21 22 | . tooltip{ margin-left:100px; } .tooltip-inner { background: #ff3333; /*tooltip text background color*/ border-radius: 0px; font-weight: bolder; box-shadow: 1px 1px 1px 1px black; } .tooltip.top .tooltip-arrow { border-top-color: red; margin-left: -55px; } input[type="text"],input[type="password"],input[type="number"],input[type="email"], #CountryDropdownlst { box-shadow: 1px 1px 1px 1px grey; width: 200px; } #CountryDropdownlst{ height:27px; } /*.tooltip-inner tooltip-arrow { margin-left: 200px; |
Now run the Application and you will get the Window as shown below:

Without entering anything into the fields, just click on the Register button and see what happens.