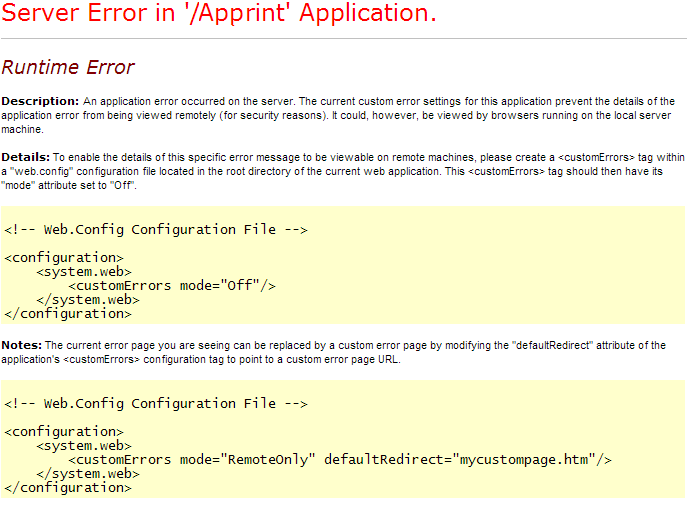
CheapASPNETHostingReview.com | Best and cheap ASP.NET Hosting. Some times after hosting web application on the server, we get unexpected error as shown in the below fig. But we did get the detailed message for the unexpected errror. In this article, I would like to share how can we get detailed message for the unexpected error.
This type of unexpected error may occurs on local or remote server. In asp.net, we can find the exact error message by setting mode=”Off” with in customErrors tag in web.config of our application. This is the way by which we can find out the exact error in our web application
1
2
3
4
5
6
<system.web>
<customErrors mode="Off">
</customErrors>
...
...
</system.web>
When we set the customErrors mode=”Off” then we can easily track the error in the application as shown in the fig.
In Asp.net, there are three error modes to trace an error. These modes decide whether or not an error message is displayed. RemoteOnly mode is default mode for displaying error messages.
Off Mode
This mode is responsible for displaying error mesage on local and remote server in case of an error.
On Mode
This mode is responsible for displaying custom error page with message on local and remote server in case of an error. By using this mode, we can show our own custom error messages page for specific errors on local and remote server.
RemoteOnly
This mode is responsible for displaying error mesage on remote server only in case of an error. By using this mode, we can show our own custom error messages page for specific errors on remote server only.
I hope you will enjoy these tricks while programming with Asp.Net. I would like to have feedback from my blog readers. Your valuable feedback, question, or comments about this article are always welcome.
CheapASPNETHostingReview.com | Best and cheap ASSP.NET Hosting. The ASP.NET framework provides built-in settings to control how to respond when an application error occurs. This functionality is part of the Web.Config customErrors section.
Configuration Options for Web.Config <customErrors>
Like most web.config settings, customErrors can be configured within the Machine.config, root web.config or your application web.config file. Usually, it is set per application.
CustomErrors supports the following modes:
On – If defaultRedirect is specified, they will see that content. Otherwise the default error screen with fewer details.
Off – Detailed error details will be shown to the user. (the “yellow screen of death screen”)
RemoteOnly – Default value. Detailed errors only are shown to local users. Remote users receive custom error screens or fewer details.
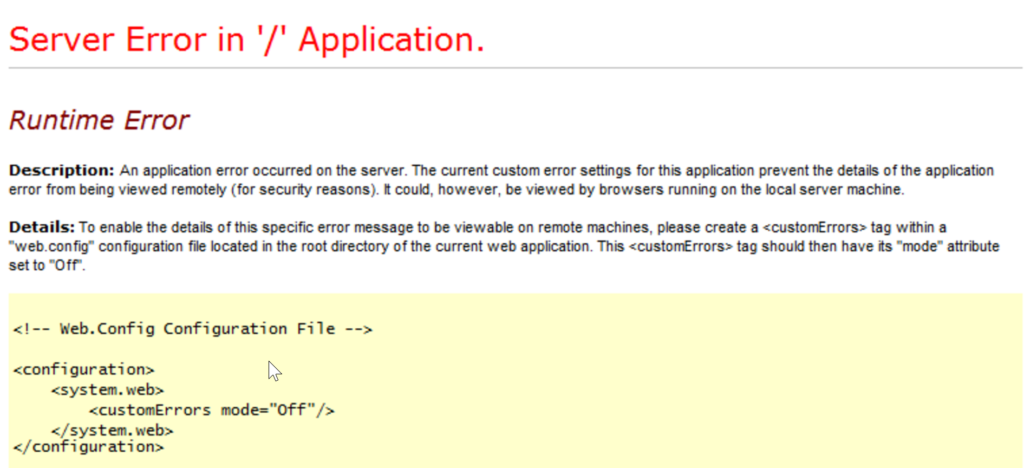
How to View Full ASP.NET Error Details, Disabling Custom Errors
If your application is throwing errors, but you cannot see the full error message, you can disable customErrors.
To do this, you will want to set customErrors mode to “Off” as shown below. Be careful though as this could expose sensitive information shown in error messages as well as detailed stack traces.
1
2
3
4
5
<configuration>
<system.web>
<customErrors mode="Off"/>
</system.web>
</configuration>
Other Ways to View ASP.NET Exceptions
There are other ways to track, find, and view application errors besides the ASP.NET yellow screen of death. Ideally, your application should be logging all of your errors to a log file and error monitoring service. You can also check Windows Event Viewer, and you may be able to see your exceptions. Although, be warned that exceptions are rate limited to Event Viewer and it does not record all of them.
How to Log All Application Errors
Depending on your type of application, there are potentially multiple ways to do this. If your application has a Global.asax file, you can subscribe to unhandled exceptions as shown below:
How to View All Application Exceptions With Retrace
Retrace provides code-level performance monitoring for your application. Part of that includes collecting all application exceptions. Retrace can collect unhandled exceptions, exceptions explicitly logged to it, or every single exception ever is thrown (first chance exceptions).
To make the most of your application errors, you should use an error monitoring service, like Retrace. Benefits of an error monitoring service:
Real-time alerts – know immediately when a new error happens
Centralized repository – one place your team can access everything
Error rates – quickly identify large spikes in error rates
Improve productivity – find root cause of problems much faster
CheapASPNETHostingReview.com | Best and cheap ASP.NET MVC hosting. In all the above articles I have explained about ASP.Net MVC. Now I think you are clear about ASP.Net MVC and creating simple ASP.Net MVC applications. Whenever we are developing the applications we are related to a database and in the database driven applications we need to perform CRUD operations. On various blogs and sites you will find CRUD operation samples about ASP.Net MVC. But on many the sites I have seen they are all using Entity Framework to perform the CRUD. Since it is the standard, we have to follow it while developing ASP.Net MVC applications instead of using DataSet, Command, Connection, DataAdapter and DataReader. But in many cases we have to use these ADO.Net 2.0 operations. In this article we will perform all the operations using ADO.NET instead of the ADO.NET Entity Framework. But use these ADO.Net only where you need to else use the ADO.Net Entity Framework only. So let’s start performing CRUD using ADO.Net.
Step 1 : Create the table in your database with the following script.
1
2
3
4
5
6
Create Table Authors
(
AuthorId intIdentity(1,1)Primary Key,
Fname Varchar(50),
Lname Varchar(50)
)
Step 2 : Now create a new ASP.Net MVC3 Web application with an empty template. This will create one predefined structure with Controllers, Modes and Views folders. All these folders are empty; now we have to add the content to these folders.
Step 3 : As you know, first we have to create a controller so let’s add a new controller with the name Home in the controllers folder. Now our empty controller is ready with an Index method. On the index method we will call the dataset from the database to display the existing Authors in our table. For this we will create a model which will return the dataset, then we will display this data on the view through the Index method of the Home controller. So let’s create one model i.e. class in Models folder with the name SelectModel and write the following code in it to retrieve the data from the database.
SqlCommand cmd=newSqlCommand("Select AuthorId,Fname,Lname From Authors",cn);
DataSet ds=newDataSet();
SqlDataAdapter da=newSqlDataAdapter(cmd);
da.Fill(ds);
returnds;
}
In the selectModel class we have one method called GetAllAuthors which returns the dataset of all authors. Now modify your Index method of Home Controller like Entity Framework.
In the above line of code we called the GetAllAuthors method from SelectModel which will return the dataset object and simply we put this dataset in the viewbag. As you know in C# 4.0 we have dynamic programming; you can see one excellent example with viewbag. Here we have written ViewBag.AuthorList which will create dynamically on Author list on runtime for us. Still now we are finished up to calling the dataset and transferring it to the view but still we don’t have any view so right-click in the Index method and add a new empty view to display our authorlist and write the following markup to display the results.
<%=Html.ActionLink("Add New Author","Add")%>
In the above markup we are displaying our authorlist by creating a HTML table with having Edit and Delete links and lastly having one more ActionLink to add a new author record.
Step 4 : At this stage we are ready with our Index or select operation; now we can add more methods to our Home Controller to perform Edit, Update and Delete operation so let’s start with adding a new record i.e. inserting a new record in the database. In the last step we added an Add New Author ActionLink with Add method so we need to add two more methods in our Home Controller, one for displaying the fields and another for inserting the values; but before that we need to create our model. So add one Model class called InsertModel in your models folder and write the code like below.
SqlCommand cmd=newSqlCommand("Insert Into Authors(Fname,Lname)Values('"+_fname+"','"+_lname+"')",cn);
cn.Open();
returncmd.ExecuteNonQuery();
}
The Above code contains some properties with attributes that are used for validation on our view as well as the InsertModel contains Insert method for inserting values in database. Now our InsertModel is ready, so you can add two methods for adding the record in the database add one ADD method with [HttpGet] and a second ADD method with [HttpPost] attributes. These attributes are all of you known. So create two add methods like below.
In the above code, first one add method simply returns the view to take some input from the user and the second add method gets the values from the view and validates it and inserts these values into the database by calling the Insert method of InserModel.
Step 5 : Still now we have only finished Select and Insert operations; now we will see Edit and update. In step3 we have added one edit link bind with AuthorId. On the basis of this AuthorId we will Edit the record and update the record in the database. As in previous steps we need one more Model class so add a Model class called UpdateModel and write the code like below.
SqlCommand cmd=newSqlCommand("Update Authors Set Fname='"+_fname+"',Lname='"+_lname+"' Where AuthorId="+_authorid,cn);
cn.Open();
returncmd.ExecuteNonQuery();
}
In the above code we have properties and one Update method to update the record in the database. In all ModelClasses you can see I’m using ADO.Net only. Now we have our model class ready so we can add some methods to perform Edit and update operations in our Home Controller so add two more methods called Edit for editing and updating the records like below.
In the above code you can see first the edit method performs some logic to call the specified id record from the database and display this record on the view and the second Edit method performs the update operations.
Step 6 : Now our last operation still remains, i.e. delete; so to delete, add one more model called DeleteModel and write the following code which contains only a delete method to delete the record of the specified AuthorId from the database
SqlCommand cmd=newSqlCommand("Delete From Authors Where AuthorId="+id,cn);
cn.Open();
returncmd.ExecuteNonQuery();
}
In Step3 we have added one ActionLink with delete and given the authorid to it for deleting the specified authorid record from the database. So now we can add one Delete Method in our Home Controller, so add it and write the following code to call the delete method of the DeleteModel to delete the record.
Now we have completed all our operations. Now you can run the application and can perform all the Select, Insert, Update and Delete operations.
Conclusion: In this article we have seen how to add, edit, update and delete the records using ADO.NET in ASP.Net MVC. I hope you enjoyed this article.
CheapASPNETHostingReview.com | Best and cheap ASP.NET hosting. The IHttpHandler interface is an underused interface in my humble opinion. It gives the developer the ability to process HTTP requests with custom HTTP handlers. Have you ever wondered why aspx pages are processed by ASP.NET?
To answer that question, you need to open the Application Configuration dialog in IIS. This example uses IIS 6. The Application Configuration is located on the Home Directory tab in IIS. Clicking the configuration button opens the Application Configuration dialog shown below. Highlighted is the .aspx Application Extension. The executable path for this extension is c:\windows\microsoft.net\framework\v2.0.50727\aspnet_isapi.dll.
When IIS receives a request and the extension is .aspx, it directs the request to the aspnet_isapi.dll. The aspnet_isapi.dll will check the web.config file located in C:\Windows\Microsoft.NET\Framework\v2.0.50727\CONFIG to see what class will handle the request. The following code is a small extract of the web.config file:
In the code above, the httpHanders section has an entry for *.aspx. All *.aspx requests will be processed by the System.Web.UI.PagehandlerFactory class. You as the developer have the ability to process HTTP requests with customer HTTP handlers. In the following article I’ll take you through a typical business scenario where custom HTTP handlers are great. Here are the business rules we must follow:
ceo files can only be viewed by the CEO
The CEO must be logged into the website
Open Visual Studio 2008 and choose File > New > Web > ASP.NET Web Application. C# users can name the application as ‘HttpHandler’. VB.NET users can call it ‘HttpHandlerVB’
Right click the project and choose Add > New Folder. Rename the folder to SecuredFiles. This is where the CEO files will be. Add a new text file to this folder and rename the extension to *.ceo.
Right click the project and choose Add > New Item > Generic Handler.
Open the CustomHandler.ashx file and add the following code: C#
The CustomHandler class implements the IHttpHandler interface. Implementing this interface allows you to create custom HTTP handlers. The two methods that we must implement are ProcessRequest and IsReusable. ProcessRequest accepts the HttpContext as a parameter, which contains all the information about the HTTP request. We want this HTTP handler to check HttpContext to ensure the HTTP request is from an authenticated user and they’re username is CEO. Next you must update the web.config file and add a new entry to the httpHandlers section. The following xml is required:
This tells our website that if there are any HTTP requests for pages that have a *.ceo extension, they will be processed by the WebApplication1.CustomHandler class. To complete this demo you’ll need to update the web.config file to use Forms authentication. The following xml is required:
Right click on the project and choose Add > New Item > Web Form. Add a Login control to the page and add the following code to the Authenticate event: C#
The authentication would normally be verified against a database, but for this example we’ll let everyone through. Type in any username and password of your choice. Once the user has logged in they’ll be redirected to the Default.aspx page. There is a link to the CEO file. Clicking on that link will direct the HTTP request to the CustomerHandler class. If the user has logged in as CEO (username: Ceo) they will be able to download the file. If not, they will see a message on the screen that says No access unless you’re the CEO!!!. HTTP handlers are a great way to write generic functions to handle HTTP requests. You can utilize HTTP handlers to process both GET and POST requests. I’ve found them useful for the scenario above and I’m positive you can take this example and come up with other ways to utilize this powerful tool.
CheapASPNETHostingReview.com | Best and cheap ASP.NET Core MVC hosting. Now it’s time to tackle a common scenario – securing your .NET Core Web app (even when accessed via Angular).
To keep things simple for this example, we’re going to require our users to log in as soon as they enter our app.
We can use ASP.NET Core to redirect the user to a login page as soon as they hit our default controller action (/home/index).
That way, they can’t even load our Angular app until they’re logged in.
Once they’ve logged in (via Google), Angular will load as normal and any requests from the Angular app to our Web API will work.
The end result
Let’s start by looking at the end result.
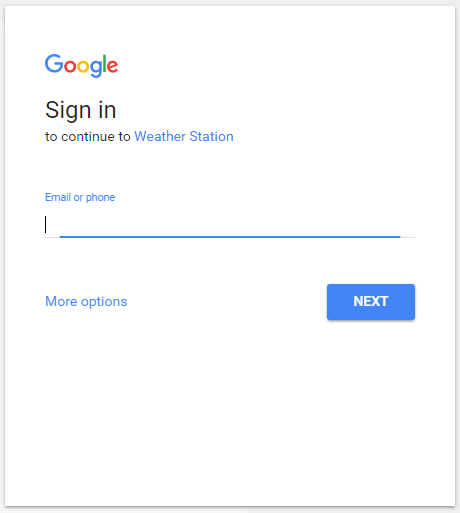
When we’ve made the changes to our app, any users attempting to access it will be redirected to this amazing login page.
We’re not going to win any prizes for design here but it will get us up and running. When your user clicks the Log in with Google link, they’ll be redirected to Google for authentication.
Once they’ve confirmed their email and password, they’ll be redirected back to your application, along with tokens confirming they have been authenticated.
ASP.NET Core will then accept those tokens as proof of identity and check for them on every request to a secure part of your app.
Sample App
To save spinning up yet another sample app, I’m going to use my Angular 2 Weather Station for this.
However, any ASP.NET Core MVC app will suffice.
If you don’t already have one and want to spin up a new app to play along, this should work…
As we covered in our look at big picture, you need an Authorization server. The Auth server takes care of requesting user credentials, confirming they are who they claim to be, then redirecting them back to your application with an access token.
To save ourselves the hassle of creating our own login system for now, we’re going to use Google as our Authorization Server (using OAuth2 and OpenId Connect).
What in the world is OAuth 2 and OpenId Connect?
OK, I’ll level with you.
When I started putting together this article, I fully intended to use OAuth 2 by itself.
If you’re not familiar with it, OAuth 2 is a means by which you can request an authorization key for your app via a third party e.g. Google.
The thing is though, it was never really designed for true user authentication.
If you think back to our house analogy from the big picture. OAuth 2 will give users a key to your house, but once they have a key, there’s no longer any guarantee that they are who they claim to be. They could have given that key to anyone who can now do what they like in your house!
Also, there are no strict rules on how OAuth2 should be implemented. The big providers like Google and Facebook started encouraging sites to use it for pseudo Authentication, hence “Login with Google” buttons appearing everywhere. But OAuth2 by itself is pretty weak for Authentication and there have been a number of significant holes found in it over the last few years.
This is where OpenId Connect comes in. This sits on top of OAuth 2 and effectively turns it into the secure authentication framework you really want it to be.
Using OpenId Connect, you can be much more sure that the person holding the key to your web app is the person they claim to be.
The good news is, setting up OpenId Connect in ASP.NET Core is pretty straightforward and definitely worth it for the extra security it provides.
Set up your app in Google
The first step is to head on over to Google to set up the OAuth 2.0 side of things.
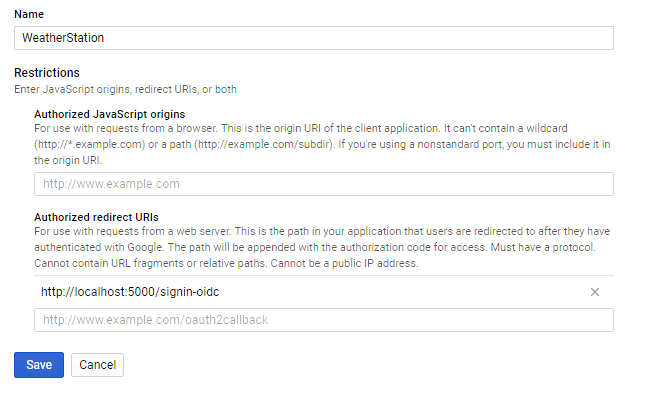
You’ll need to generate credentials for your app (to use when talking to Google) and set up redirect URLs so your users are redirected back to your app when login succeeds or fails.
You can follow the guide on Setting up OAuth 2.0 over at Google’s official support site.
Go ahead, do that now, then you can follow along with the next steps.
Note, as part of the set up, you will need to provide an Authorized redirect URI.
Assuming your ASP.NET app is using the default port, you will typically want to add http://localhost:5000/signin-oidc for testing on your local machine.
But watch out, if you’re using Visual Studio 2017, your app might run via IISExpress using a different port, you’ll need to use the correct URL either way.
Securing the ASP.NET Core app
Now it’s time to look at our ASP.NET MVC app.
You can easily restrict any part of your app using the [Authorize] attribute.
Given we want to block users before they even get to the Angular app, we’ll go ahead and lock down our Home controller’s Index Action.
Modify HomeController.cs as follows.
1
2
3
4
5
6
7
8
9
10
11
12
13
14
15
16
17
18
19
using Microsoft.AspNetCore.Authorization;
using Microsoft.AspNetCore.Mvc;
namespaceWeatherStation.Controllers
{
publicclassHomeController:Controller
{
[Authorize]
publicIActionResult Index()
{
returnView();
}
publicIActionResult Error()
{
returnView();
}
}
}
When a user accesses our angular app, they start here. With this attribute in place, our application is now effectively restricted to logged in users.
It’s a bit brute force, but this is the simplest approach we can take whilst we get our heads around how all of this works, before we get in to more complicated scenarios like letting users into part of our SPA before requiring them to log in.
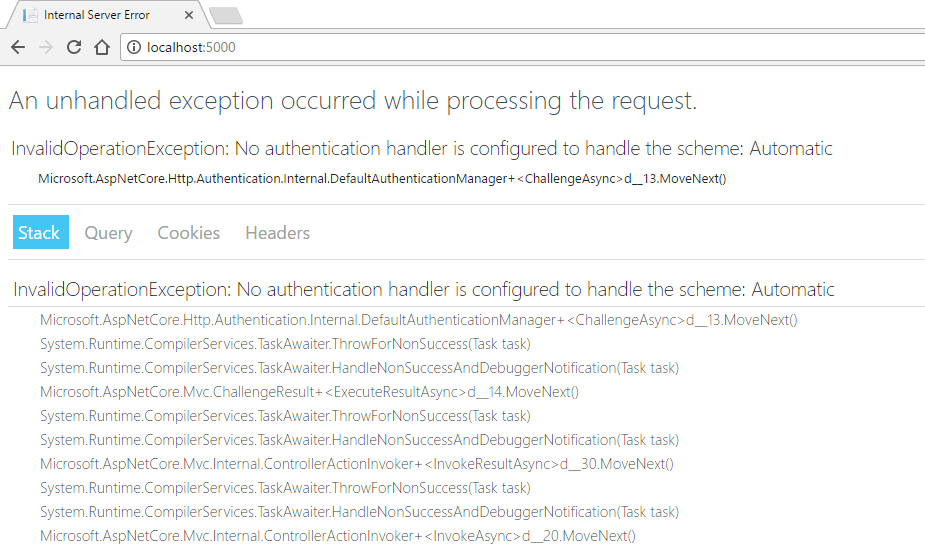
All well and good, but if we stop here we’ve literally prevented anyone from getting into our app.
To remedy that, we need to tell ASP.NET Core how we want users to be authenticated, along with some important details like where to send them when they’re not.
Authentication with Cookies
To keep things simple, we’ll use Cookie Authentication here. If anyone tries to access a restricted resource and doesn’t have a legitimate ASP.NET security cookie, they will be redirected to our super login page.
Start off by bringing in the Microsoft Cookies Nuget package.
You can get hold of your ClientId and ClientSecret from Google (assuming you’ve followed the instructions to set up Google OAuth2)
Important: Don’t go including your Id and Secret “naked” in the code like this other than for testing. In reality you’ll want to protect this sensitive information. One option is to use App Secrets during development.
As you can see, OpenId Connect is actually pretty simple to set up. You need to point it at an authority server (Google in this case).
The OnRedirectToIdentityProvider event handler is there to make sure users are redirected to our login page when they try to access a restricted part of the app. The Request.Path check simply makes sure we don’t accidentally block our app as it attempts to complete the sign-in process via Google.
Give it a spin
All that’s left is to test it out.
When you access your app you’ll be redirected to the login page.
From there, clicking on the Login link will send you off to Google where you can log in with your Google account.
Once you’ve done that, you’ll be sent back to your app where you’ll have been granted access.
Lock down those APIs
So far we haven’t locked down our API controllers. That means anyone (logged in or not) can still go directly to our APIs.
Thankfully, now we’ve tackled the OpenId Connect plumbing, it’s trivial to add the [Authorize] attribute to any of our API controllers, locking them down for anyone but authorized users (who have an auth cookie).
Now your users can log in via Google (using OpenIdConnect).
Once Google’s confirmed their identity (by asking them to log in), they’re redirected back to your app, complete with access and identity tokens.
ASP.NET Core’s Cookie Middleware then kicks in to serialize your user’s principal (information about their identity) into an encrypted cookie. Thereafter, any requests to your app validate the cookie, recreate the principal and assign it to the User property on HttpContext.
One last thing, you might want to give your users a way to sign out of your app. Just add the following to your AccountController.
CheapASPNETHostingReview.com| Best and cheap ASP.NET hosting. In this tutorial we will show you how to using Microsoft Enterprise Library is a collection of reusable software components used for logging, validation, data access, exception handling etc.
Here I am describing how to use Microsoft Enterprise Library for data access.
Step 1: First download the project from http://entlib.codeplex.com/ URL. Step 2: Now extract the project to get
And give reference in the Bin directory by Right click on Bin -> Add Reference -> then give the path of these 4 dlls. Then
Step 3: Modification in the web.config for Connection String.
1
<add name="ASPHostPortalConnection"providerName="System.Data.SqlClient"connectionString="DataSource=ASPHostPortalSQLEXPRESS;Initial Catalog=ASPHostPortal;User ID=sa;Password=admintest;Min Pool Size=10;Max Pool Size=100;Connect Timeout=100"/>
Give the connection string as above where Datasource is your data source name, Initial Catalog is your database name and User ID and Password as in your sql server.
Step 4:
Now it is time to write the code. Write the below 2 lines in the using block.
The above code is a sample that will return a dataset. Here Fewlines4bijuConnection is the connection name and Topics_Return is the stored procedure name that is nothing but a Select statement. But if the stored procedure is taking parameter then the code will be like:
As the code explained above ASPHostPortal Connection is the connection name and Topics_Save is the stored procedure name that is taking 3 (Subject,Description,PostedBy) input parameters and 1(Status) output parameter.
You may give values from textbox, I am here provideing sample values like “Here is the subject”, “Here is the Descriptiont” or you may give the UserID from session, I am here giving 4. The output parameter will give you a string as defined and the code to get the value is
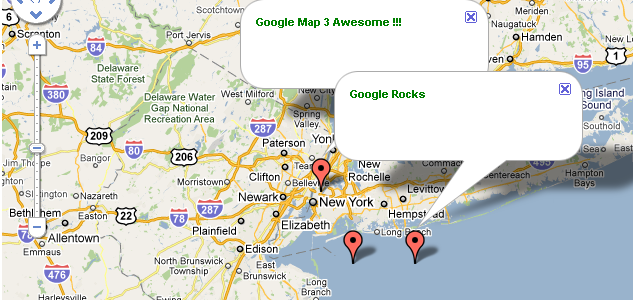
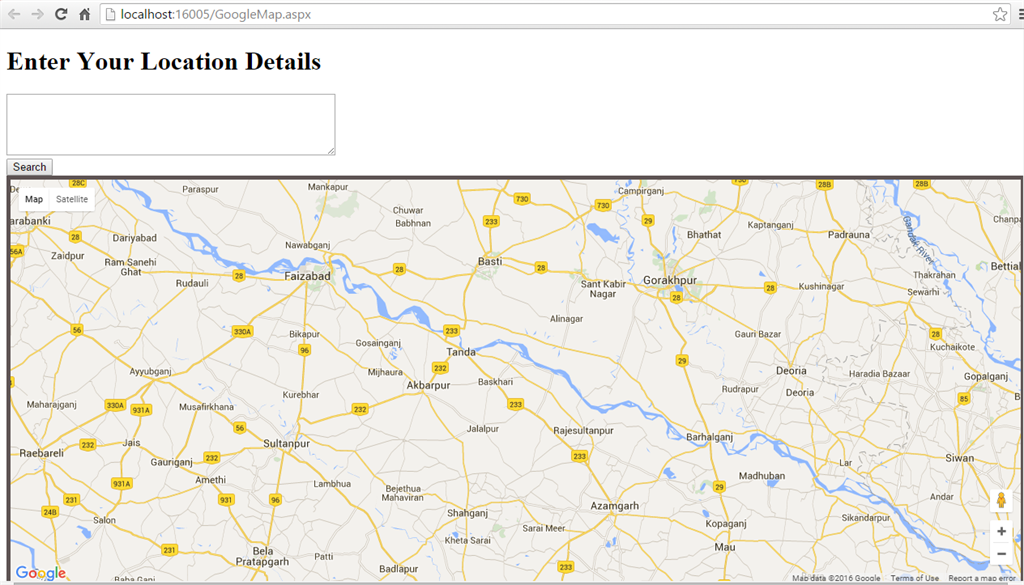
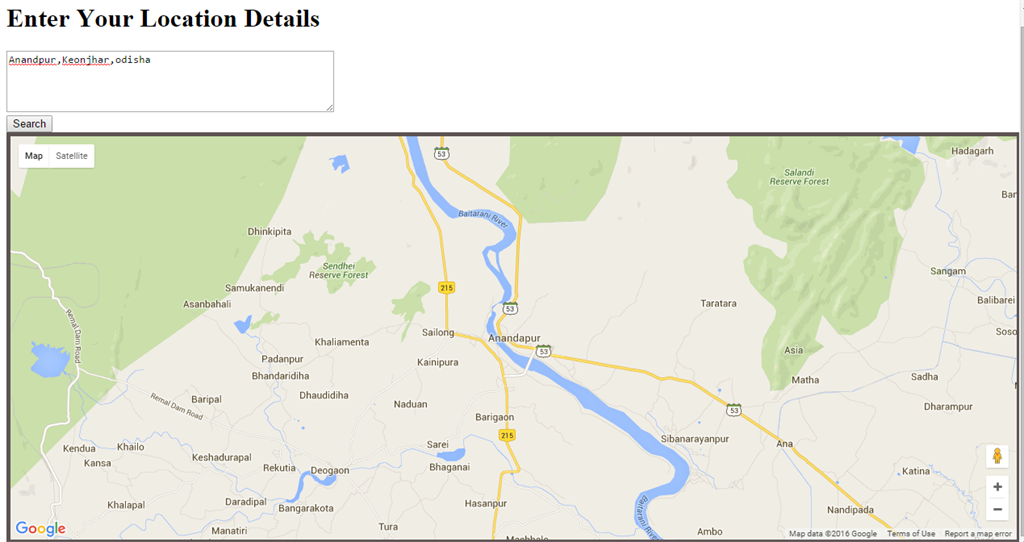
CheapASPNETHostingReview.com | Best and cheap ASP.NET hosting. In this article I am going to explain toyou about Google Maps and how to integrate it to search any location in ASP.NET. Google Maps is a Web-based service that provides detailed information about geographical regions and sites around the world.
Nowadays Google Maps is used in every application for various requirements. Here in this article I am going to discuss how to integrate Google Maps to search any location in ASP.NET.
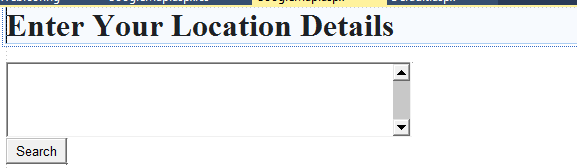
First of all, to integrate Google Maps create a new project in Visual studio. Add a new webform as follows.
Design the webform as in the following:
Add the following script in the head section
1
2
3
4
5
6
7
8
9
10
11
12
13
14
15
16
17
18
19
20
21
22
23
24
25
26
27
28
29
30
31
32
33
34
35
36
37
38
<head runat="server">
<title></title>
<!DOCTYPE link href="https://maps/documentation/javascript/examples/default.css"rel="stylesheet"/>
CheapASPNETHostingReview.com | Best and cheap ASP.NET Core 1.0 hosting. This article shows how localized data can be created and used in a running ASP.NET Core application without restarting. The Localization.SqlLocalizer package is used to to get and localize the data, and also to save the resources to a database. Any database which is supported by Entity Framework Core can be used.
Configuring the localization
The Localization.SqlLocalizer package is configured in the Startup class in the ConfigureServices method. In this example, a SQLite database is used to store and retrieve the data. The LocalizationModelContext DbContext needs to be configured for the SQL Localization. The LocalizationModelContext class is defined inside the Localization.SqlLocalizer package.
The AddSqlLocalization extension method is used to define the services and initial the SQL localization when required. The UseTypeFullNames options is set to true, so that the Full Type names are used to retrieve the localized data. The different supported cultures are also defined as required.
The database also needs to be created. This can be done using Entity Framework Core migrations.
1
2
3
4
5
>
>dotnet ef migrations add LocalizationMigrations--context LocalizationModelContext
>
>dotnet ef database update--context LocalizationModelContext
>
Now the SQL Localization is ready to use.
Saving the localized data
The application creates products with localized data using the ShopAdmin API. A test method AddTestData is used to add dummy data to the database and call the provider logic. This will later be replaced by an Angular 2 form component in the third part of this series.
The ProductCudProvider uses the LocalizationModelContext, and the ProductCudProvider class to save the data to the database. The class creates the entities from the View model DTO and adds them to the database. Once saved the IStringExtendedLocalizerFactory interface method ResetCache is used to reset the cache of the localized data. The cache could also be reset for each Type if required.
1
2
3
4
5
6
7
8
9
10
11
12
13
14
15
16
17
18
19
20
21
22
23
24
25
26
27
28
29
30
31
32
33
34
35
36
37
38
39
40
41
42
43
44
45
46
47
48
49
50
51
52
using Angular2LocalizationAspNetCore.Models;
using Angular2LocalizationAspNetCore.Resources;
using Angular2LocalizationAspNetCore.ViewModels;
using Localization.SqlLocalizer.DbStringLocalizer;
The Shop API is used to request the product data with the localized fields. The GetAvailableProducts method returns all products localized in the current culture.
The ProductRequestProvider is used to get the data from the database. Each product description and name are localized. The Localization data is retrieved from the database for the first request, and then read from the cache, unless the localization data was updated. The IStringLocalizer is used to localize the data.
1
2
3
4
5
6
7
8
9
10
11
12
13
14
15
16
17
18
19
20
21
22
23
24
25
26
27
28
29
30
31
32
33
34
35
36
37
38
39
40
41
42
43
44
45
46
using System;
using System.Collections.Generic;
using System.Linq;
using Angular2LocalizationAspNetCore.Models;
using Angular2LocalizationAspNetCore.Resources;
using Angular2LocalizationAspNetCore.ViewModels;
using Localization.SqlLocalizer.DbStringLocalizer;
CheapASPNETHostingReview.com | Best and cheap ASP.NET Hosting. Here I will explain how to export data from sql server to excel in asp.net using c# or export data from sql server database to excel in asp.net using c#.
Description:
Now I will explain to you, how to export data from sql server to excel in asp.net using c#. Before implement this example first design one table UserInformation in your database as shown below Once table created in database enter some dummy data to test application after that write the following code in your aspx page
Column Name
Data Type
Allow Nulls
UserId
int
Yes
UserName
varchar(50)
Yes
Location
varchar(50)
Yes
1
2
3
4
5
6
7
8
9
10
11
12
13
<html xmlns="http://www.w3.org/1999/xhtml">
<head runat="server">
<title>Export data from sql server database toexcel inasp.net usingc#</title>