How To Logging with Microsoft.NET

How To Logging with Microsoft.NET

CheapASPNETHostingReview.com | Best and cheap ASP.NET Hosting. Through this article, we will explain in depth logging in .NET applications. We will explain this through two steps:

  1. Introduction to System.Diagnostics (prebuilt logging namespace in .NET)
  2. Introduction to Log4net

I. System.Diagnostics Namespace

The System.Diagnostics namespace provides classes that allow you to interact with system processes, event logs, and performance counters, Classes like EventLog which provides functionality to write to event logs, read event log entries, and create and delete event logs and event sources on the network. TraceSource which also provides a set of methods and properties that enable applications to trace the execution of code and associate trace messages with their source. In this paragraph, we will implement a tracing/Logging library based on the TraceSource Class. This library enable users to:

  • trace different scenarios inside applications [StartStopErrorInformationCriticalWarning]
  • The Trace destination is configurable, it can be a file, it can be a console application and it supports also sending Log Message by mail.

To do so, this logging utility contains:

  • Interface called Logger.cs
  • Interface called ILogger.cs
  • Enumeration called LogType which presents the destination of trace messages

The class that implements the interface ILogger.cs:

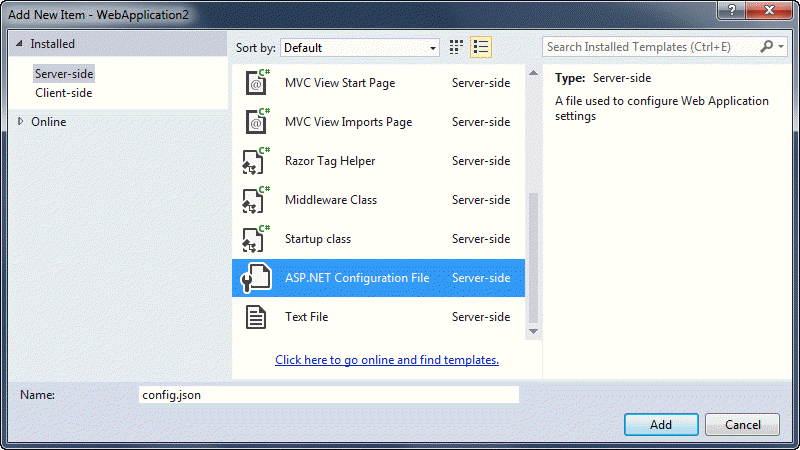
Now let’s see how to configure the library through the configuration file. The configuration file will determine:

  1. The name of the source
  2. The type of destination message [a text file, a console file, etc…]
  3. The trace option output, in our case, the output of any trace containing this message
    • The type of trace [information, Error, warning, etc…]
    • Date Time of the trace
    • Thread ID
    • Process ID
    • TimeStamp

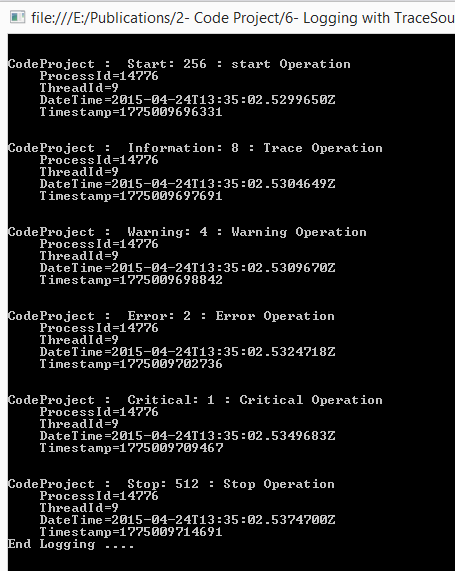
Testing the library:

Console_Display

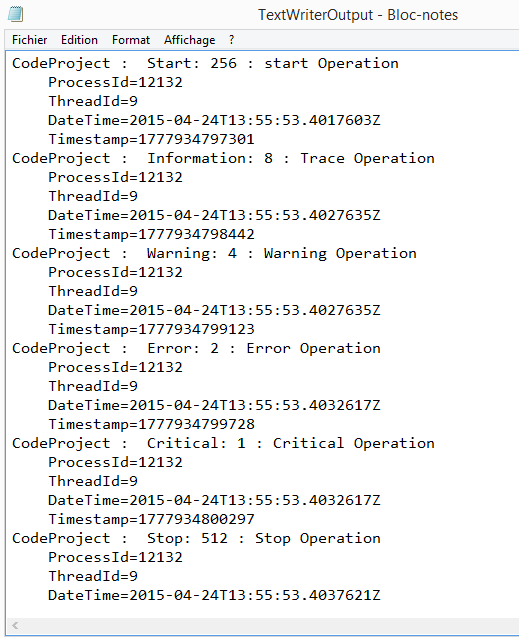
If we want to customize the destination of trace messages, for example, display the trace message in a file system, we just add a ‘TextWriterTraceListener‘ to the configuration file:

Displaying trace messages in Bloc Notes.

TextListener

  1. You can customize the tracing output’s target by adding or removing TraceListener instances to or from the collection stored in the TraceSource.Listeners property. By default, trace output is produced using an instance of the DefaultTraceListener class. The preceding configuration file example demonstrates removing the DefaultTraceListener and adding a TextWriterTraceListener/ConsoleTraceListener to produce the trace output for the trace source.

    As a Microsoft developer, I have always been more comfortable when implementing my own libraries based on .NET prebuilt namespaces because I want to have absolute control on my source code, but I have seen many projects using Logging with third party libraries, for example, Log4Net. In the next paragraph, we will learn how to integrate this library into our applications.

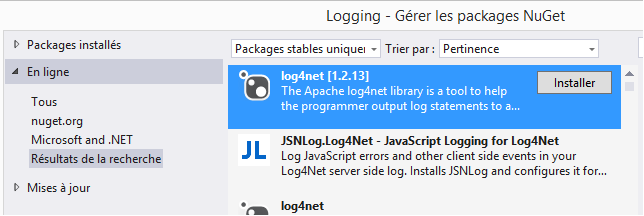
II. Logging with Log4NET

The Apache log4net library is a tool to help the programmer output log statements to a variety of output targets. Log4net is a port of the log4j framework to Microsoft.NET platform. To integrate this library, you must use nuget package manager.

3_-_Add_Log4net_through_nuget

Like the TraceSource class, Log4net library enables the developer to customize message tracing (changing the log destinations and the format of messages). We will write two scenarios:

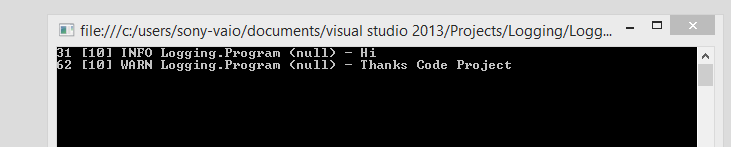
  • Default Configuration [Console Configuration]

4-_Default_Log4Net_configuration

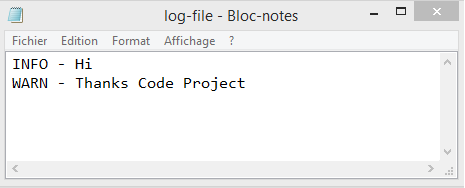
  • Using custom configuration [saving messages into a text file].

XML Configuration file

Displaying trace messages in Bloc Notes.

5-FileAppender

Summary

Log4net is a port of Log4j to the .NET universe, Log4j is a popular logging framework and that’s why log4net has rapidly grown. The class System.Diagnostics.TraceSource provides high performance logging and tracing for applications but both use nearly the same mechanism.

I hope that you appreciated my effort. Thank you for viewing my blog post, try to download the source code and do not hesitate to leave your questions.

How To Displaying Google Maps in ASP.NET Application

How To Displaying Google Maps in ASP.NET Application

CheapASPNETHostingReview.com | Best and cheap ASP.NET hosting. In this article I am going to explain toyou about Google Maps and how to integrate it to search any location in ASP.NET. Google Maps is a Web-based service that provides detailed information about geographical regions and sites around the world.

Nowadays Google Maps is used in every application for various requirements. Here in this article I am going to discuss how to integrate Google Maps to search any location in ASP.NET.

First of all, to integrate Google Maps create a new project in Visual studio. Add a new webform as follows.

Design the webform as in the following:

google1

Add the following script in the head section

Now add the following div to populate the google map. Here is my complete HTML code.

Here I am attaching the screen shot of my UI.

google2

Now save and run the application.

google3

Now type any location and press the search button, it will search the location and will be shown in the div.

googleLocation

In this way we can search any location detail in Google maps.

How to Create Dynamic DropDownLists in ASP.NET

How to Create Dynamic DropDownLists in ASP.NET

CheapASPNETHostingReview.com | Best and cheap ASP.NET hosting. In this post I will tell you how to create Dynamic DropDownLists in ASP.NET

Object:

  • Create dropdownlist dynamically with autopostback property true
  • Keep dropdownlist during postback
  • Maintain selected value during postback.

Here is the sample for this :

To Create Dynamic Dropdownlist:

To retrieve value on button click:

Right Now, No output because dynamic controls are lost in postback then what to do.
So we need to save dynamic controls value and generate dynamic controls again.we need to maintain viewstate.

Using a Calculation Engine for .NET

Using a Calculation Engine for .NET

CheapASPNETHostingReview.com | Best and cheap ASP.NET hosting. “Creating a mathematical expression evaluator is one of the most interesting exercises in computer science, whatever the language used. This is the first step towards really understanding what sort of magic is hidden behind compilers and interpreters….“.

I agree completely, and hope that you do too.

Using the CalcEngine class

The CalcEngine class performs two main tasks:

  1. Parses strings that contain formulas into Expression objects that can be evaluated.
  2. Evaluates Expression objects and returns the value they represent.

To evaluate a string that represents a formula, you call the CalcEngine.Parse method to get an Expression, then call the Expression.Evaluate method to get the value. For example:

Function names are case-insensitive (as in Excel), and the parameters are themselves expressions. This allows the engine to calculate expressions such as “=ATAN(2+2, 4+4*SIN(4))”.

The CalcEngine class also provides a Functions property that returns a dictionary containing all the functions currently defined. This can be useful if you ever need to enumerate remove functions from the engine.

Notice how the method implementation listed above casts the expression parameters to the expected type (double). This works because the Expression class implements implicit converters to several types (string, double, bool, and DateTime). I find that the implicit converters allow me to write code that is concise and clear.

If you don’t like implicit converters, the alternative would be to override ToString in the Expression class and add ToDouble, ToDateTime, ToBoolean, etc.

Variables: Binding to simple values

Most calculation engines provide a way for you to define variables which can be used in expressions. The CalcEngine class implements a Variables dictionary that associates keys (variable names) and values (variable contents).

For example, the code below defines a variable named angle and calculates a short sine table:

Variables: Binding to CLR objects

In addition to simple values, the CalcEngine class implements a DataContext property that allows callers to connect a regular .NET object to the engine’s evaluation context. The engine uses Reflection to access the properties of the object so they can be used in expressions.

This approach is similar to the binding mechanism used in WPF and Silverlight, and is substantially more powerful than the simple value approach described in the previous section. However, it is also slower than using simple values as variables.

For example, if you wanted to perform calculations on an object of type Customer, you could do it like this:

CalcEngine supports binding to sub-properties and collections. The object assigned to the DataContext property can represent complex business objects and entire data models.

This approach makes it easier to integrate the calculation engine into the application, because the variables it uses are just plain old CLR objects. You don’t have to learn anything new in order to apply validation, notifications, serialization, etc.

Variables: Binding to dynamic objects

The original usage scenario for the calculation engine was an Excel-like application, so it had to be able to support cell range objects such as “A1” or “A1:B10”. This requires a different approach, since the cell ranges have to be parsed dynamically (it would not be practical to define a DataContext object with properties A1, A2, A3, etc).

To support this scenario, the CalcEngine implements a virtual method called GetExternalObject. Derived classes can override this method to parse identifiers and dynamically build objects that can be evaluated.

If the object returned implements the CalcEngine.IValueObject interface, the engine evaluates it by calling the IValueObject.GetValue method. Otherwise, the object itself is used as the value.

If the object returned implements the IEnumerable interface, then functions that take multiple values (such as Sum, Count, or Average) use the IEnumerable implementation to get all the values represented by the object.

For example, the sample application included with this article defines a DataGridCalcEngine class that derives from CalcEngine and overrides GetExternalObject to support Excel-style ranges. This is described in detail in a later section (“Adding Formula Support to the DataGridView Control”).

Optimizations

I mentioned earlier that the CalcEngine class performs two main functions: parsing and evaluating.

If you look at the CalcEngine code, you will notice that the parsing methods are written for speed, sometimes even at the expense of clarity. The GetToken method is especially critical, and has been through several rounds of profiling and tweaking.

For example, GetToken detects characters and digits using logical statements instead of the convenient char.IsAlpha or char.IsDigit methods. This does make a difference that shows up clearly in the benchmarks.

In addition to this, CalcEngine implements two other optimization techniques:

Expression caching

The parsing process typically consumes more time than the actual evaluation, so it makes sense to keep track of parsed expressions and avoid parsing them again, especially if the same expressions are likely to be used over and over again (as in spreadsheet cells or report fields, for example).

The CalcEngine class implements an expression cache that handles this automatically. The CalcEngine.Evaluate method looks up the expression in the cache before trying to parse it. The cache is based on WeakReference objects, so unused expressions eventually get removed from the cache by the .NET garbage collector. (This technique is also used in the NCalc library.)

Expression caching can be turned off by setting the CalcEngine.CacheExpressions property to false.

Expression optimization

After a string has been parsed, the resulting expression can sometimes be optimized by replacing parts of the expression that refer only to constant values. For example, consider the expression:

This expression contains several constants and functions of constants. It can be simplified to:

This second expression is equivalent to the first, but can be evaluated much faster.

Expression simplification was surprisingly easy to implement. It consists of a virtual Expression.Optimize method that is called immediately after an expression is parsed.

The base Expression class provides an Optimize method that does nothing:

This simply allows all derived classes that derive from Expression to implement their own optimization strategy.

For example, the BinaryExpression class implements the Optimize method as follows:

The method calls the Optimize method on each of the two operand expressions. If the resulting optimized expressions are both literal values, then the method calculates the result (which is a constant) and returns a literal expression that represents the result.

To illustrate further, function call expressions are optimized as follows:

First, all parameters are optimized. Next, if all optimized parameters are literals, the function call itself is replaced with a literal expression that represents the result.

Expression optimization reduces evaluation time at the expense of a slight increase in parse time. It can be turned off by setting the CalcEngine.OptimizeExpressions property to false.

Globalization

The CalcEngine class has a CultureInfo property that allows you to define how the engine should parse numbers and dates in expressions.

By default, the CalcEngine.CultureInfo property is set to CultureInfo.CurrentCulture, which causes it to use the settings selected by the user for parsing numbers and dates. In English systems, numbers and dates look like “123.456” and “12/31/2011”. In German or Spanish systems, numbers and dates look like “123,456” and “31/12/2011”. This is the behavior used by Microsoft Excel.

If you prefer to use expressions that look the same on all systems, you can set the CalcEngine.CultureInfo property to CultureInfo.InvariantCulture for example, or to whatever your favorite culture happens to be.

Sample: A DataGridView control with formula support

The sample included with this article shows how the CalcEngine class can be used to extend the standard Microsoft DataGridView control to support Excel-style formulas. The image at the start of the article shows the sample in action.

Note that the formula support described here is restricted to typing formulas into cells and evaluating them. The sample does not implement Excel’s more advanced features like automatic reference adjustment for clipboard operations, selection-style formula editing, reference coloring, and so on.

The DataGridCalcEngine class

The sample defines a DataGridCalcEngine class that extends CalcEngine with a reference to the grid that owns the engine. The grid is responsible for storing the cell values which are used in the calculations.

The DataGridCalcEngine class adds cell range support by overriding the CalcEngine.GetExternalObject method as follows:

The method analyzes the identifier passed in as a parameter. If the identifier can be parsed as a cell reference (e.g., “A1” or “AZ123:XC23”), then the method builds and returns a CellRangeReference object. If the identifier cannot be parsed as an expression, the method returns null.

The CellRangeReference class is implemented as follows:

The CellRangeReference class implements the IValueObject interface to return the value in the first cell in the range. It does this by calling the owner grid’s Evaluate method.

The CellRangeReference also implements the IEnumerable interface to return the value of all cells in the range. This allows the calculation engine to evaluate expressions such as “Sum(A1:B10)”.

Notice that the GetValue method listed above uses an _evaluating flag to keep track of ranges that are currently being evaluated. This allows the class to detect circular references, where cells contain formulas that reference the cell itself or other cells that depend on the original cell.

The DataGridCalc class

The sample also implements a DataGridCalc class that derives from DataGridView and adds a DataGridCalcEngine member.

To display formula results, the DataGridCalc class overrides the OnCellFormatting method as follows:

The method starts by retrieving the value stored in the cell. If the cell is not in edit mode, and the value is a string that starts with an equals sign, the method uses CalcEngine to evaluate the formula and assigns the result to the cell.

If the cell is in edit mode, then the editor displays the formula rather than the value. This allows users to edit the formulas by typing into in the cells, just like they do in Excel.

If the expression evaluation causes any errors, the error message is displayed in the cell.

At this point, the grid will evaluate expressions and show their results. But it does not track dependencies, so if you type a new value into cell “A1” for example, any formulas that use the value in “A1” will not be updated.

To address this, the DataGridCalc class overrides the OnCellEditEnded method to invalidate the control. This causes all visible cells to be repainted and automatically recalculated after any edits.

Let’s not forget that implementation of the Evaluate method used by the CellRangeReference class listed earlier. The method starts by retrieving the cell content. If the content is a string that starts with an equals sign, the method evaluates it and returns the result; otherwise it returns the content itself:

That is all there is to the DataGridCalc class. Notice that calculated values are never stored anywhere . All formulas are parsed and evaluated on demand.

The sample application creates a DataTable with 50 columns and 50 rows, and binds that table to the grid. The table stores the values and formulas typed by users.

The sample also implements an Excel-style formula bar across the top of the form that shows the current cell address, content, and has a context menu that shows the functions available and their parameters.

Finally, the sample has a status bar along the bottom that shows summary statistics for the current selection (Sum, Count, and Average, as in Excel 2010). The summary statistics are calculated using the grid’s CalcEngine as well.

Testing

I built some testing methods right into the CalcEngine class. In debug builds, these are called by the class constructor:

This ensures that tests are performed whenever the class is used (in debug mode), and that derived classes do not break any core functionality when they override the base class methods.

The Test method is implemented in a Tester.cs file that extends the CalcEngine using partial classes. All test methods are enclosed in an #if DEBUG/#endif block, so they are not included in release builds.

This mechanism worked well during development. It helped detect many subtle bugs that might have gone unnoticed if I had forgotten to run my unit tests when working on separate projects.

Benchmarks

While implementing the CalcEngine class, I used benchmarks to compare its size and performance with alternate libraries and make sure CalcEngine was doing a good job. A lot of the optimizations that went into the CalcEngine class came from these benchmarks.

I compared CalcEngine with two other similar libraries which seem to be among the best available. Both of these started as CodeProject articles and later moved to CodePlex:

  • NCalc: This is a really nice library, small, efficient, and feature-rich. I could not use NCalc in my Silverlight project because it relies on the ANTLR runtime DLL, which cannot be used in Silverlight projects (at least I couldn’t figure out how to do it).
  • Flee: Unlike CalcEngine and NCalc, Flee keeps track of formulas, their values, and dependencies. When a formula changes, Flee re-evaluates all cells that depend on it. One of the interesting features of Flee is that it actually compiles formulas into IL. This represents a trade-off since compilation is quite slow, but evaluation is extremely fast. I decided not to use Flee in my Silverlight project because it is relatively large and the parsing times were too long for the type of application I had in mind.

The benchmarking method was similar to the one described by Gary Beene in his 2007 Equation Parsers article. Each engine was tested for parsing and evaluating performance using three expressions. The total time spent was used to calculate a “Meps” (million expressions parsed or evaluated per second) index that represents the engine speed.

The expressions used were the following:

Where “a” and “b” are variables set to 2 and 4.

Each engine parsed and evaluated the expressions 500,000 times. The times were added and used to calculate the “Meps” index by dividing the number of repetitions by the time consumed. The results were as follows:

Time in secondsSpeeds in “Meps”
LibraryParseEvaluateParseEvaluate
CalcEngine1.41.31.041.18
NCalc7.15.70.210.26
Flee1,283.00.50.002.91
CalcEngine*10.71.50.140.99
NCalc*145.25.70.010.27

speed

Some comments about the benchmark results:

  • CalcEngine performed well, being the fastest parser and the second fastest evaluator (after Flee).
  • Flee is literally “off the charts” on both counts, almost 900 times slower parsing and 2.5 times faster evaluating than CalcEngine. Because Flee compiles formulas to IL, I expected slow parsing and fast evaluation, but the magnitude of the difference was surprising.
  • Entries marked with asterisks were performed with optimizations off. They are included to demonstrate the impact of the optimization options.

In addition to speed, size is important, especially for Silverlight applications that need to be downloaded to the client machine. Here is a comparison of library sizes:

LibrarySize (kB)
CalcEngine26
NCalc188
Flee202

size

CalcEngine is the smallest library by far, more than seven times smaller than NCalc. If necessary, it could be trimmed even further by removing some of the less important built-in functions.

Conclusion

The CalcEngine class is compact, fast, extensible, and multi-platform. I think it is different enough from NCalc and Flee to add value for many types of projects, especially Silverlight applications like the one it was created for. You can see the Silverlight app in action in the image below.

excelBookDemo

I hope others will find CalcEngine useful and interesting as well.

How to Backup and Restore Database in ASP.NET

How to Backup and Restore Database in ASP.NET

CheapASPNETHostingReview.com | Best and cheap ASP.NET Hosting. Sometimes we need to provide backup and restore facility in ASP.NET application in application’s control panel. In this article, I am going to explain how to develop a database backup and restore application in ASP.NET. I have taken example of SQL Server in this article however, this application can be used to backup and restore any database that .NET supports. You just need to change their provider instead of System.Data.SqlClient and a single SQL Statement to list the table names of the database. I will explain them in details later in this article.

net

My Backup and Restore web application looks like below:

1. Create a UI for database backup and restore

In this step, let us create a simple UI in ASP.NET to list all the database tables in the ListBox control that let the end user select the table to take backup and restore. Also put two buttons named Backup and Restore to do its respective functionality. My code for above UI looks like below:

2. Populate the database table in the ListBox control

In this step, we will write method that will populate all database tables in the ListBox control that will let the end user select the table to perform Backup or Restore. My code looks like below:

You can notice in the above code snippet, I am calling a method named PopulateDatabaseTables() in the Not IsPostBack condition under Page_Load event that will populate all the tables of the database in the ListBox control. Notice the select statement that has been stored into sql variable. This select statement varies between databases to databases. To list all the tables in SQL Server database, you need to use above select statement. To list all the tables of the MySQL database, you need to write “show tables” in place of above select statement. Of course, you need to change the provider as well to connect to the MySQL database.

3. Code for taking backup of the selected table

In this step, we shall write code to take backup of the selected table when Backup button will be clicked. You can see that in OnClick event of the Backup button, I have specified BackupNow method. Let us see the code for this method.

In the above code snippet, I have got the selected table name form ListBox in the tableName variable. Selected all records from that table and filled into a DataSet named dSetBackup. Later on I used WriteXml method of DataSet to write the contents of the selected table in an xml file. The name of the xml file will be the table name in my case and will be placed in the backup folder. Then I have written a success message. This way your end user will be able to take backup of all the tables in the database.

4. Code for restoring selected table

In this step, we shall see how to restore a selected table into the database once the Restore button will be clicked. Notice the Restore button where I have specified RestoreNow method in the OnClick event. The code for this method looks like below:

Please note that in order to above code snippet work, you must have the schema in place into the Restore database. This schema must match the original database schema from which you had taken backup otherwise your restore will not work.

In the above code snippet, I am first getting the connection string of the database where we need to restore the data. Then I am getting the schema of the selected table into the dSetBackup DataSet using dAd (SqlDataAdapter), as there will not be any row into the restore database, so it will only give the schema of the table. This will help us to push the backed up data into this DataSet. In the next line, I have read the backed up xml of the table using ReadXml method of the DataSet that will get all the backed up data for that table into the dSet DataSet. In next line, I am looping through every rows of the dSet DataSet table and adding them into our dSetBackup DataSet. Next, I have created a SqlCommandBuilder object for the SqlDataAdapter. This will internally build insert, update, delete statement for the dSetBackup DataTable. In the following line, I have used dAd.Update (SqlDataAdapter update method) to push the data into the restore database. At last I am writing the success message. Simple! Isn’t it?

Save

Cheap Hosting Article – Tips To Fight With SEO Before Launching Your Website

Cheap Hosting Article – Tips To Fight With SEO Before Launching Your Website

CheapASPNETHostingReview.com | In this article, I will show you the steps needed to complete before launching your website. If you have created a website and want to launch it and also want it to crawl by Google, this article is for you.

Only writing the code for making a website does not close your task. We create website for a particular purpose, some of us create it for blogging, some of us create social networking site, some of us create e-commerce website. So, these websites has some purpose.

But I hope all of you want your website to be first on Google crawl. You want it to make it a number one website. So, here I am going to present some tips which should be done by you to launch your site on the internet.

5-WordPress-SEO-Tips-for-Beginners

The following are the steps which is required for your website to engage to multiple users and to come on top of website in Google search.

Tips To Fight With SEO Before Launching Your Website

  • Sort and Simple Domain NameI hope you all know the domain name. Actually domain name is the identity of your website on the internet. It is always unique.
    For example: http://asphostportal.com
    So your domain name should be simple which can be pronounced easily. It should also be short so that it is easy to remember.

Sort and Simple Domain Name

  • PerformanceNow a days, no one wants to wait for loading the website, so performance is a major concern if you are going to create a website. So, create faster website which loads within 3 to 4 seconds. If your site is slow no one would want it.

Performance

  • Favicon

    Add favicon for your website, it is a sign or copyright of your site. It is a short form of your logo which is shown on the left side of tab.
  • Title

    Your title should be SEO friendly and change for every page depending on the content of the page. Don’t use too much numeric character and hyphen or special character with title, since it is not easy to remember these characters.
  • Metadata

    Metadata is an important part of your code; it should change for every page as per the content of the page. It contains the title, keyword, description and lots of other data which is required for your website for search. It makes your website SEO friendly.

This tells the search engine that this website contains these types of data.

  • Cross browser check

    Before making your website live check that is it opening with all the web browsers. You need to check some previous versions of browser because there is no guarante that all are using the latest browsers.

Cross browser Check

  • Check Content

    You need to check grammar, spelling and syntax before making it live. If you are writing a blog, article or any content, it must not have wrong grammar and spelling.
  • Links

    Check that all links are working or not. Try to check some unwanted links or modify the links to know what is happening. If someone uses wrong url then your site should show a proper message which should be user friendly. These are interconnected to each other.
  • JavaScript Check

    Check your website; if one of the web browser disabled the javascript, in that case check how your site is behaving.
  • ALT tag 

    Always use alt tag with images and media files, because sometimes for network related issue your site does not open properly, then instead of images and media files your alt tag content should be shown to user.

  • Check Validation

    Before making your website live check all the validations which is attached to the form on the website like it can be a contact us page, comment section, etc. Check if all validations are working fine or not.
  • Error Page

    If something is wrong with your website for any reason, website should show the specific error page which is related to that error and it should be user friendly. Don’t show programming error on the website.
  • OptimizeBefore launching your website, optimize website like images should not too heavy and minify the css and JavaScript files to load faster. Always use cache for static content. It makes your site faster.
  • Sitemap

    Sitemap is an important part of SEO. When any search engine goes to crawl your website, firstly they check your sitemap.xml file and get the relevant url from the sitemap.

You should make your website with sitemap.xml file and it must be uploaded in the root directory of the website. If you make any new url, note that it should be updated into the sitemap.


SiteMap

  • Make Social Presence You can also create social page for your website, because all of us engage with social sites on daily basis. It can be Facebook, Google+ or a Twitter page.


Cheap ASP.NET Security With SQL Server 2005

Cheap ASP.NET Security With SQL Server 2005

CheapASPNETHostingRerview.com  | Cheap and Reliable ASP.NET hosting. This article focuses on security concerm when using SQL Server 2005 in ASP.NET application..

Today I was trying to access the web page from and getting following error
Error Message:Login failed for user . The user is not associated with a trusted SQL Server connection.Web server and database are on different server and I am using Virtual machines (VMWare) for my development and DB server.There can be problem in SQL server or IIS or application, so lets start with SQL Server.SQL Server Settings: The security should be set for SQL Server and Windows Authentication.

pic1

The SQL server has the logins for authenticated users and has proper permissions as I also use development machine to maintain DB.

IIS: Open IIS and select properties and under directory security tab click edit button.

pic2

Uncheck Anonymous access and check integrated windows security; integrated windows security will enable users login to be used for authentication instead of IIS default user.

pic3

Now, lets put application web.config under microscope.
I have custom error tag to redirect error to default page

This is good and for testing I set the Mode tag to off
Connection string uses integrated security tag and set it to true.

Here is another tag identity. Ah! Impersonate is false and I want it false so I can have connection pooling.

So where is the problem, all the setting seems right, why the heck it does not work.
I changes the identity impersonate tag to true and Voila! It works.J
For the time being I can work but it’s not a solution. L Adding a login to SQL Server for IIS user of web server is also not going to work.


Cheap ASP.NET 5 hosting Configuration

Cheap ASP.NET 5 hosting Configuration

CheapASPNETHostingReview.com | Cheap and reliable ASP.NET 5 hosting. Today I will share my article about ASP.NET 5 configuration. This is the third in a series of articles that explores ASP.NET 5 by reconstructing the Visual Studio 2015 Web Application template from an Empty template. This article looks at the new configuration system added to ASP.NET 5 and will also cover how services like Entity Framework and MVC itself are added to the project. The series of articles has been developed using Visual Studio RTM and ASP.NET 5 Beta 6. It will be kept updated along with newer releases.

Goodbye XML, Hello JSON

In the past, ASP.NET has been built on a foundation of XML. Web Forms .aspx and .ascx files are basically XML files and configuration in previous versions of ASP.NET is managed in an XML file called web.config. The web.config file has a particular structure and a class (System.Web.Configuration.WebConfigurationManager) devoted to providing access to it. In ASP.NET 5 JSON is the preferred format for storing structured information such as configuration. This change has largely been driven, I suspect, by the desire to appeal to web developers working on other platforms who are more used to JSON as a structured data format. The first article in this series has already looked at the new JSON solution and project files: global.json and project.json.

The default replacement for the web.config file is config.json. You can also choose to use an XML file if you prefer, and INI files, environment variables, command line arguments and an in-memory option are supported natively too. The template for a config.json file is labelled as ASP.NET Configuration File in the Add New Item dialog:

18-08-2015-13-36-06

Cheap ASP.NET 5 Hosting Recommendation Click Here

When you add one, the templated content provides a placeholder for a connection string:

Strongly Typed AppSettings

In earlier versions of ASP.NET, it is quite common to store application-wide constants in the appSettings section of a web.config file. You can store these values in the config.json file instead. Previous Beta release templates included an example of this, but it has been removed from the Beta 6 template. The steps described below demonstrate how to use the config.json file to store appsettings and how to provide strongly-typed access to them.

  • Add the highlighted code to the config.json file:
  • Right click on the Properties node in Solution Explorer (depicted by a wrench icon) and select Add » New Item.
  • Add a C# class file named AppSettings.cs and replace its default content with the following:
  • Change the dependencies section in project.json to include the highlighted lines below
  • Make the following highlighted changes to Startup.cs:
  • Press Ctrl+F5 to run the application without debugging. You should see “My Web Site” written to the browser.

28-08-2015-08-21-02

You started by adding a new section called AppSettings to the config.json file and declaring a property with a value. Then you created a C# class called AppSettings with one property that matches the one you added to the config file. The AppSettings class is designed to provide strongly typed access to the appSettings section of the config.json file. You added a couple of packages to the project.json file to make them available to the application. The first package enables you to use JSON as the format for your configuration data. The second package introduces MVC into the application.

Cheap ASP.NET 5 Hosting Recommendation Click Here

In the Startup class, you added a constructor where you instantiated a variable representing the project’s configuration as the config.json file and assigned that to a property that you created of type IConfiguration. This holds the values loaded from the configuration source (the config.json file). You made the AppSettings available to the application by registering it with the dependency injection system in the ConfigureServices method. The method you used mapped the json values from the configuration file to the AppSettings class. You also registered the MVC framework with the dependency injection system. Finally, you used the GetService<T> extension method to retrieve the AppSettings from the DI system in the Startup class’sConfigure method where you used them to write the SiteTitle value to the browser.

Summary
The configuration model introduced with ASP.NET 5 is a world away from the one in previous versions of ASP.NET. It is a plug and play system that supports various data formats (JSON, XML, INI files) out of the box. You can also write your own configuration providers to cater for alternative formats. This article looked at the default JSON format and saw how to add new sections. It also covered how to reference the values in the new section in a strongy typed manner through the use of Options. You saw how to make the configuration available as a service which you registered with the built-in Dependency Injection system. In the next article, I will explore dependency injection in ASP.NET 5 in more detail.