CheapASPNETHostingReview.com | Best and cheap ASP.NET Core 2.0 hosting. It’s been a year since ASP.NET Core and Visual Studio Code became available and early adopters have endured CLI changes and RC changes. If you’ve held off getting into ASP.NET Core for these reasons you are probably now curious about the cross-platform capabilities of Visual Studio Code. It appears as if things are (mostly) stable before RTM for .NET Core and ASP.NET Core later this month. So, how hard is ASP.NET Core debugging in Visual Studio Code on both Windows and OS X? As it turns out, it is not that difficult. There are a few minor details involved, but I’ve written this post to show you how easy it is to get started. There are plenty of screenshots to document the process. You’ll need Visual Studio 2015. You’ll also need Visual Studio Code installed on both a Windows machine and a Mac to get started. I’m assuming you have a minimum amount of experience with Visual Studio Code.
Code sharing steps
Since we will be sharing the same code between platforms, set up a common location using your favorite source code control. I like to use Git and Bitbucket for this purpose.
Creating the solution from a template
To get up and running fast, I chose the Visual Studio 2015 template “ASP.NET Core Web Application (.NET Core)” because of the ease of use in creating a project. Yes, this seems like cheating, but at the moment there isn’t a comparable feature for Visual Studio Code. Yes, there are Yeoman generators for ASP.NET Core but I felt the basic template in Visual Studio 2015 was more accessible to a .NET developer and didn’t require installing Yeoman.
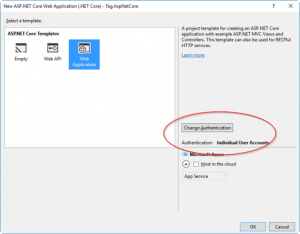
Step 1: Open Visual Studio 2015, add a new project type “ASP.NET Core Web Application (.NET Core)” and give the project a name.
Step 2: Select “Web Application” and choose the type of Authentication.
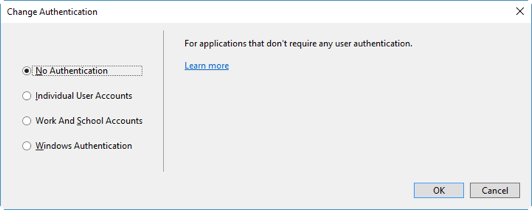
Authentication Choices:
- No Authentication – this is the option we will be choosing for this post since we are focused on setting up debugging.
- Individual User Accounts – this adds the ASP.NET Identity Framework and EntityFramework.
Using this cross-platform will be the subject of another post.
- Work and School Accounts – this uses Windows Active Directory. We won’t be using it for this post. There is advice to be found online for adding your Mac to AD if you want to pursue this option.
- Windows Authentication – This will not work for our cross-platform debugging.
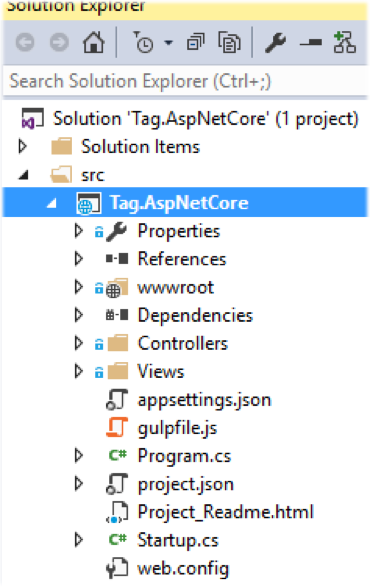
The resulting folder structure as seen in Visual Studio 2015. We can now open the project folder under “src” in Visual Studio Code.
Setting up ASP.NET Core debugging in Visual Studio Code on Windows
- If you haven’t installed the C# Debugger extension for Visual Studio Code, do that now. The extension and installation instructions can be found here.
- In Visual Studio Code, open the project folder under “src” that contains the code. For the demo this folder is “Tag.AspNetCore”.
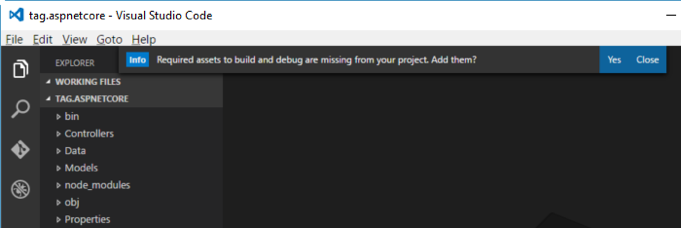
- When you first open the folder, or the first time you try to debug, you will be prompted to add required assets.
Select Yes and a “.vscode” folder will be added with a tasks.json file. This is the “Task Runner” file. We will edit that in a few steps.
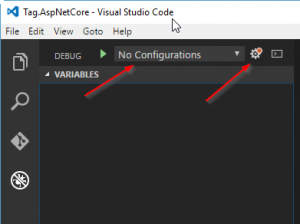
- Now, Select the Start Debug button and you will notice the message that we have “No Configuration” and there is a red notification symbol on the Settings button.
- Select the Settings button and you will be prompted to “select environment” – choose “.NET Core”.
This will create a launch.json file for you that contains the confugrations for debugging.
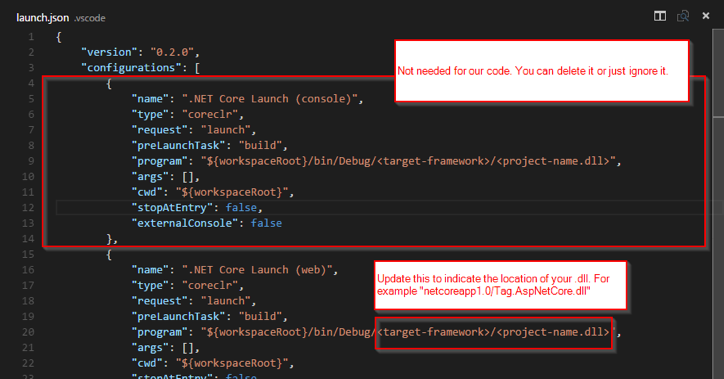
- Edit the json file. It contains three configurations: “.NET Core Launch (console)”, “.NET Core Launch (web)”, and “.NET Core Attach”. We won’t need the console configuration so you can remove it if you wish. We do need to update the web configuration’s “program” entry to point at the .dll that will be built.
Note: If you forget to edit this and try to debug, you will receive the following error:
Once you change the program path and save this file, these configurations will be presented in a dropdown to the right of the “Start Debugging (F5) button”. Select “.NET Core Launch (web):
- If you set breakpoints and try to debug again, you will find that your breakpoints will not be hit and you get the message:
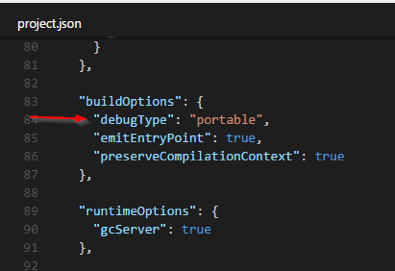
To fix this we will need to update the project.json file to tell the build process to produce a .NET Core compatible output.
- Edit the json file to add “debugType”: “portable” to “buildOptions”.
*Note: this step is one that may change by RTM as project.json will be going away and it’s features added to a csproj file. This is somewhat controversial. You can read up about that here.
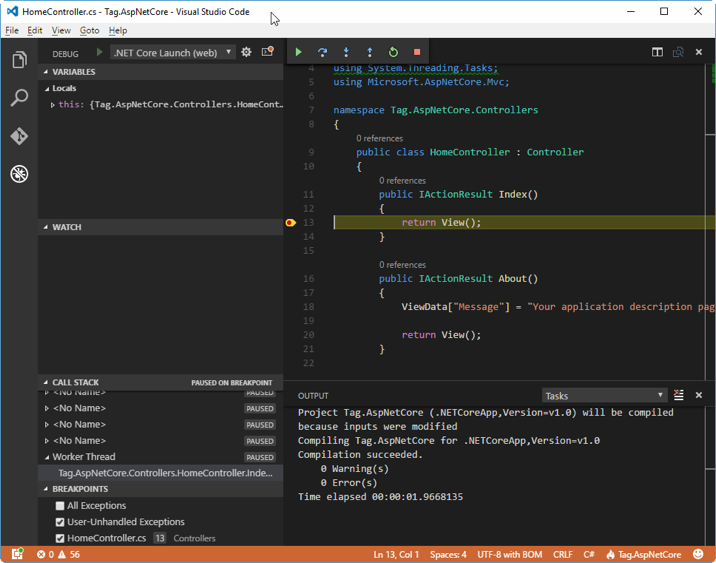
- After following those steps, you should be able to repeat step #3 above to start the debugger and the project will launch and open a window in your default browser. Now, we are debugging ASP.NET Core code in Visual Studio Code!
- Upload your code to your source code control (GitHub, Bitbucket, etc.) where we will be able to access it for the next section.
Setting up ASP.NET Core debugging in Visual Studio Code on OS X
- If you haven’t installed the C# Debugger extension for Visual Studio Code, do that now. The extension and installation instructions can be found here.
- Download the code you placed in source code control in the last section into a repository location. Then, open the project folder under “src” in Visual Studio Code.
- Select Debug View:
Make sure the configuration “.NET Core Launch (web)” is selected. Start a debugging session by pressing the Start Debug button:
At this point, the web page should launch for you successfully, and you can debug the project just like you can on Windows.
ADDING PACKAGES AS YOU DEVELOP: A DIFFERENT APPROACH WITH VISUAL STUDIO CODE
Visual Studio developers have become accustomed to the NuGet Package Manager interface and the Package Manager Console. That isn’t available in Visual Studio Code. Here is what you would have to do:
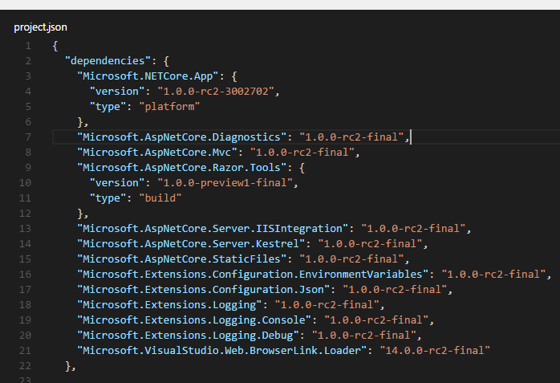
- To add a new package, you will have to add the package name and version number in the pjson file.
*Note: this step is one that may change by RTM as project.json will be going away and it’s features added to a csproj file. This is somewhat controversial. You can read up about that here.
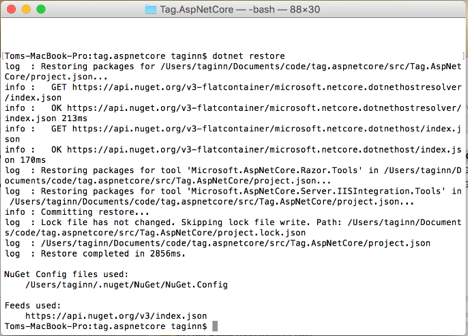
- Use the dotnet CLI command “dotnet restore”.
Final thoughts
Overall, cross-platform ASP.NET Core debugging using Visual Studio Code works well. The only disappointment seems to be the lack of support for NuGet packages within Visual Studio Code. I would like to see the dotnet CLI support package installation.
My only question for the development community is; now that you know cross-platform development and ASP.NET Core debugging can be done, do you want to do it for an ASP.NET Core website? Or, does it seem that all this was made possible just to prove it could be done? Let me know in the comments.


