CheapASPNETHostingReview.com | Best and cheap IIS hosting. In this post I will show you how to host ASP.NET application on the web server (IIS). Using Internet Information Services (IIS) Manager, you can create a local Web site for hosting an ASP.NET Web application. In this topic explains how you can create a local Web site and configure it to run ASP.NET pages.
As an alternative to creating a local site, you can also create a virtual directory. This lets you host the Web site on one computer, although the Web site content is somewhere else, such as on a remote computer. It is also a convenient way to set up a site for local Web development work because it does not require a unique site identity. This means that it requires fewer steps than creating a unique site.
Creating a Local Web site
The following procedures explain how to create a site in IIS version 7.5. and I am going to show how to host an asp.net application on IIS 7.5 in Windows 7 Home Premium Operating System. In case you are looking for trusted hosting provider, I trust on ASPHostPortal.com for my ASP.NET hosting.
Step 1
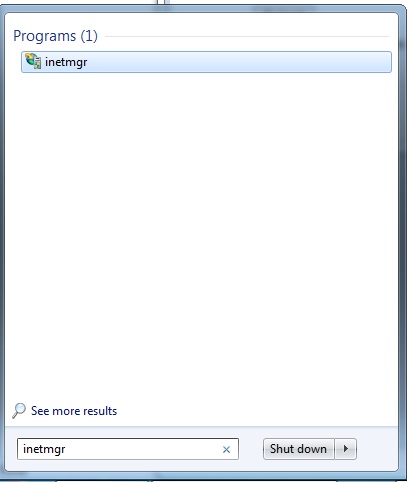
- On the Start menu, click Run.
- In the Open box, type inetmgr and then click OK.
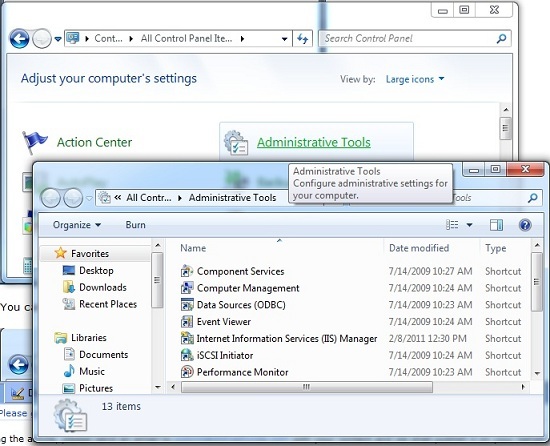
You can also achieve the same by going to Control Panel and clicking on Administrative Tools > Internet Information Services (IIS) Manager as displayed in the picture below.
If you are not able to see the Internet Information Service (IIS) Manager, your computer might not have IIS installed. To install the IIS, follow below steps.
Installing IIS on Windows 7
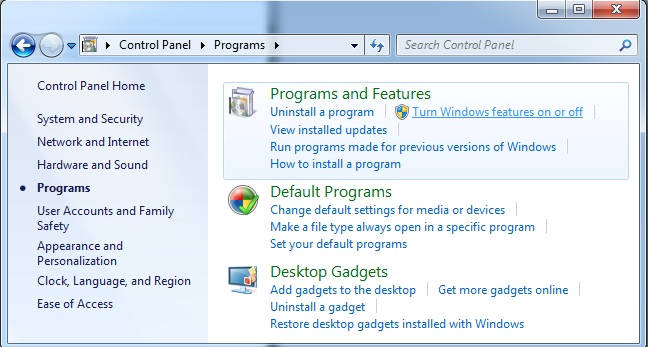
Go to Control Panel > Programs > Turn Windows Features on or off as displayed in the picture below.
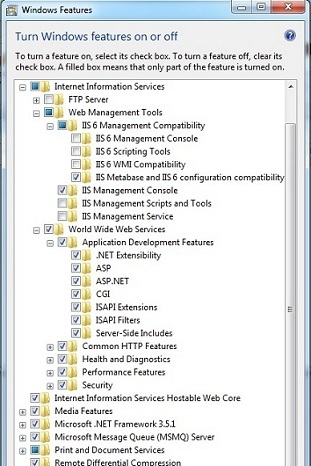
Ensure that from the Tree View, the Checkboxes against the Internet Information Services (IIS) is checked, even explore the depth of this root folder and check almost all checkboxes as displayed in the picture below. Checking almost all checkboxes will install more than enough (extra components as well that is not required for web hosting) component to get started and you may not use all the components. However later on you can uncheck to un-install those.
Step 2
Once you have opened the Internet Information Service (IIS) Manager, your screen should look like below (displayed the left panel in the below picture).
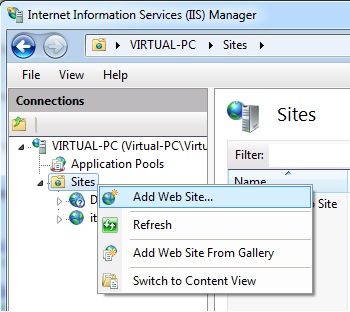
Now, right click the Sites and select Add Web Site. Enter the Site Name (in my case its SampleWebSite), select the physical folder where you have kept your website files (this may be your Visual Studio solution folder if you are setting it up at your local machine or the unpackaged folder path or the root folder of the website or web application). Now you can click on the OK button.
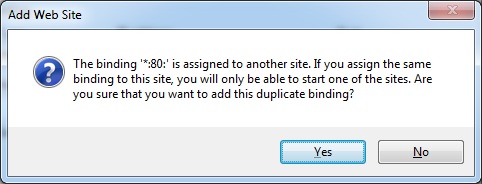
Clicking OK button may give you above alert box, complaining about the port you are going to use as by default port 80 is used for the default website of your IIS so you might want to change it. Click on No button at above alert box and change the port. I have changed the port to 8123 as displayed below and clicked on OK button.
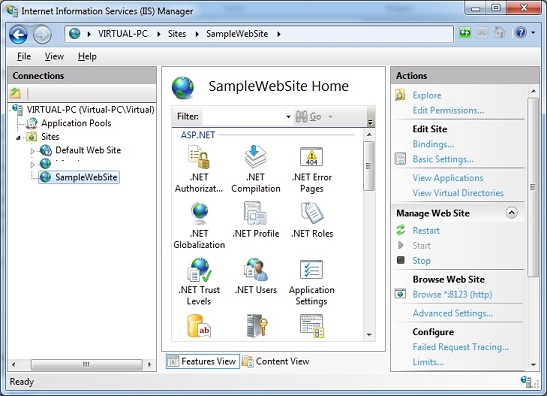
Clicking OK should give you a screen something similar to below picture where you will have a SampleWebSite created (notice at the left panel).
Step 3
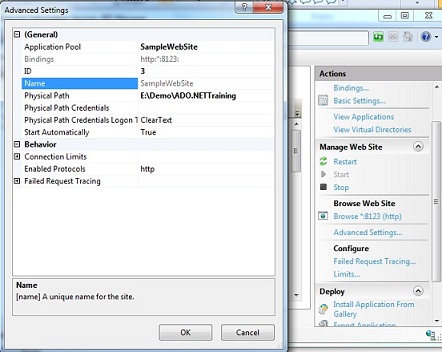
Now, you may click on the Advance Settings from the right panel and modify some settings that you want to modify. In general it is not needed and you can keep it default.
Step 4
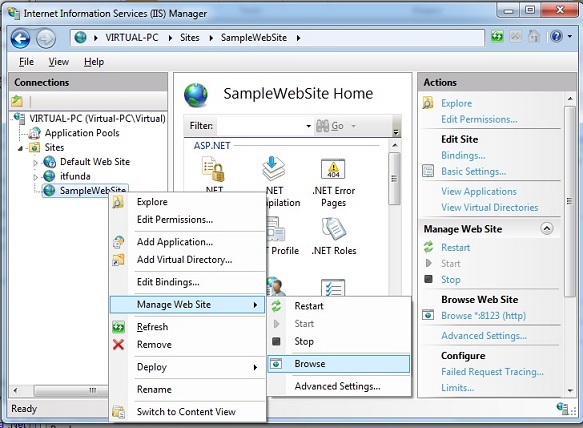
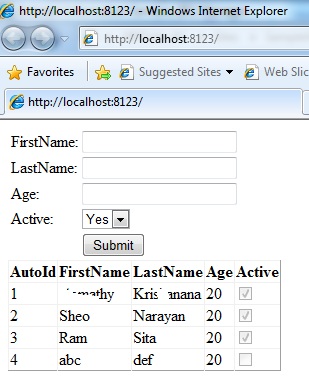
Now, your website is ready to be browsed, you can right click on the website name (SampleWebSite in my case) and go to Manage Web Site > Browse and you should have an Internet Explorer window open displaying the default page of your website or web application.
Below is the screenshot of the default page of my SampleWebSite.
Step 5 (Optional)
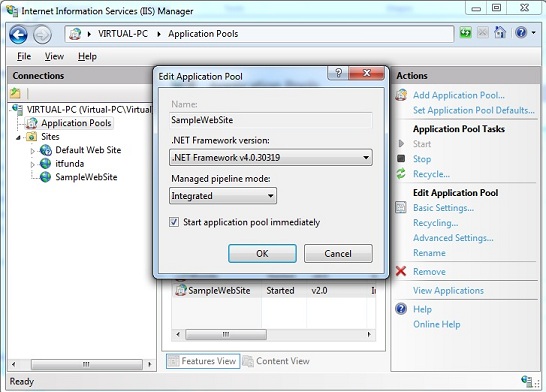
Notice: Your website may not work if you have developed your it Visual Studio 2010 as your web.config file may have some tags that is not identified by the IIS. This is becuase creating the website the way we created just now will host your website in its own application pool that will have .NET Framework version 2 as target version. So you will need to change to the .NET Framework 4.0 version.
Click on Application Pools from the left panel and double click the Application pool for your webiste (generally application pool for your website is your website name so in my case SampleWebSite) and you should see a dialogue box similar to above. Select .NET Framework v4.xxx from the .NET Framework version dropdown and click OK. Now follow the Step 4 above again and your should see the default page.


